Capturing the Magic: Your Essential Guide to Stunning Desert Safari Sunsets Photography
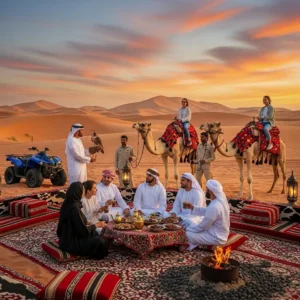
The experience of witnessing Desert Safari Sunsets is nothing short of magical. As the sun begins its descent over the endless ocean of golden dunes, it paints the sky in a breathtaking palette of fiery oranges, deep purples, and soft pinks. For any photographer, amateur or professional, this daily spectacle is a coveted opportunity. It’s a chance to capture not just a picture, but a feeling—the serene, majestic, and untamed spirit of the Arabian desert.
However, capturing the full glory of these moments can be tricky. The rapidly changing light, the vastness of the landscape, and the harsh conditions can pose significant challenges. This comprehensive guide is designed to equip you with the knowledge, techniques, and insider tips you need to transform your sunset photos from simple snapshots into awe-inspiring works of art. We will delve into everything from essential gear and camera settings to advanced composition and post-processing, ensuring your photos do justice to the stunning Desert Safari Sunsets you witness.
Why Desert Safari Sunsets are a Photographer’s Dream
What makes Desert Safari Sunsets so special for photography? It’s a combination of unique environmental factors that come together to create a visual masterpiece. The atmosphere in the desert is often clear and dry, which leads to incredibly crisp and vibrant colors in the sky. There is less atmospheric haze to diffuse the light, resulting in intense hues that are rarely seen in urban environments.
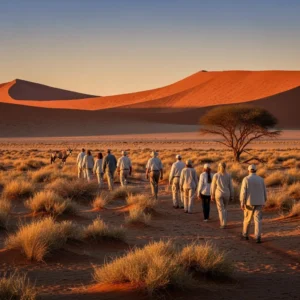
The landscape itself is a minimalist yet powerful canvas. The smooth, flowing lines of the sand dunes create dramatic shadows and highlights as the sun gets lower. These dunes provide a perfect foreground element, leading the viewer’s eye towards the horizon. The stark emptiness allows for the creation of powerful silhouettes, whether it’s a camel train, a lone acacia tree, or a fellow traveler, adding a strong narrative element to your images. The fleeting nature of the event adds to its allure, challenging you to work quickly and creatively to capture the perfect shot.
Preparing for Your Sunset Photoshoot: The Essential Gear
Having the right equipment is the first step toward capturing incredible Desert Safari Sunsets. While a high-end camera can help, understanding what gear to bring and why is far more important than having the most expensive model.
Choosing the Right Camera
Your choice of camera will influence your capabilities, but great photos can be taken with any type.
- DSLR and Mirrorless Cameras: These are the top choices for serious photographers. They offer manual control over all settings (aperture, shutter speed, ISO), the ability to shoot in RAW format for maximum editing flexibility, and the option to change lenses. This versatility is crucial for adapting to the diverse photographic opportunities that Desert Safari Sunsets present.
- Smartphones: Modern smartphones have incredibly capable cameras. With features like HDR (High Dynamic Range), portrait modes, and even “pro” modes that allow for manual adjustments, you can capture stunning images. To get the best results, use a tripod adapter and explore third-party camera apps that offer more control and RAW capture capabilities.
- Point-and-Shoot Cameras: Advanced point-and-shoot cameras can be a good compromise, offering more manual control than a smartphone in a more compact body than a DSLR. Look for models with a larger sensor and the ability to shoot in RAW.
Selecting the Perfect Lenses
The lens you use has a greater impact on the final image than the camera body.
- Wide-Angle Lens (16-35mm): This is essential for capturing the vastness of the desert landscape. It allows you to include the sweeping dunes in the foreground while showcasing the expansive, colorful sky. A wide-angle lens is perfect for creating a sense of scale and immersing the viewer in the scene.
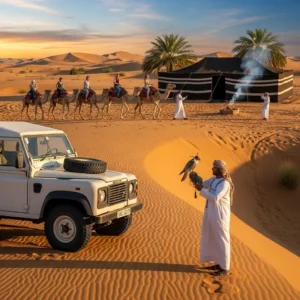
- Telephoto Lens (70-200mm): A telephoto lens is fantastic for isolating details and creating a compressed perspective. You can use it to make the setting sun appear enormous behind a distant subject, like a camel or a 4×4 vehicle. This lens is your go-to for creating dramatic, impactful shots of the sun itself.
- Standard Zoom Lens (24-70mm): If you can only bring one lens, a standard zoom is the most versatile option. It offers a range that is wide enough for landscapes and long enough to zoom in on interesting details, providing flexibility as you explore different compositions during your Desert Safari Sunsets experience.
Must-Have Accessories for Sunset Photography
These small items can make a huge difference in the quality of your photos.
- A Sturdy Tripod: This is the single most important accessory for sunset photography. As the light fades, you will need to use slower shutter speeds to capture enough light. A tripod keeps your camera perfectly still, preventing blurry photos and enabling sharp, detailed images.
- Remote Shutter Release or Timer: Even pressing the shutter button can cause a tiny shake. A remote release or using your camera’s built-in two-second timer eliminates this, ensuring maximum sharpness for your shots.
- Lens Filters:
- Graduated Neutral Density (GND) Filter: This is a game-changer for sunsets. It’s dark on top and clear on the bottom, allowing you to darken the bright sky without underexposing the darker desert foreground, balancing the exposure in a single shot.
- Polarizing Filter: A polarizer can deepen the blue tones in the sky and reduce glare on the sand, making the colors in your Desert Safari Sunsets appear more saturated and vibrant.
- Extra Batteries and Memory Cards: The desert heat can drain batteries faster than usual. Always bring at least one fully charged spare. Sunsets offer so many photo opportunities that you can easily fill a memory card, so have an extra one on hand.
- Lens Cloth and Air Blower: Fine sand is everywhere in the desert. A microfiber cloth and an air blower are essential for keeping your lenses clean and free of dust, which can ruin a perfect shot.
Mastering Your Camera Settings for Perfect Desert Safari Sunsets
Understanding your camera’s settings is what separates a good photo from a great one. Don’t rely on Auto mode; take control to truly capture the magic of the moment.
The Exposure Triangle Explained
Exposure is controlled by three elements: aperture, shutter speed, and ISO.
- Aperture (f-stop): This controls how much of the scene is in focus (depth of field). For landscapes where you want everything sharp from front to back, use a smaller aperture like f/8 to f/16. For creating a soft, blurry background, use a wider aperture like f/2.8.
- Shutter Speed: This determines how long the camera’s sensor is exposed to light. A fast shutter speed (e.g., 1/1000s) freezes motion, while a slow shutter speed (e.g., 1s) creates motion blur and requires a tripod. During Desert Safari Sunsets, your shutter speed will progressively get slower as the light fades.
- ISO: This is the camera’s sensitivity to light. Keep it as low as possible (ISO 100 or 200) to ensure the highest image quality with the least amount of “noise” or grain. Only increase the ISO as a last resort when you can’t get a proper exposure with aperture and shutter speed alone.
Shooting Modes: From Auto to Manual
- Aperture Priority Mode (A or Av): This is the best mode for sunset photography. You set the aperture (e.g., f/11 for a sharp landscape) and the ISO (e.g., 100), and the camera automatically selects the correct shutter speed. This lets you focus on composition while the camera handles the technical exposure.
- Manual Mode (M): As you get more comfortable, shooting in Manual mode gives you complete creative control. It’s particularly useful for creating silhouettes, where you need to intentionally underexpose the foreground to make it appear black.
Nailing the Focus
Getting sharp focus is critical.
- Autofocus (AF): For most of the sunset, autofocus will work well. Focus on an object in the middle distance with good contrast.
- Manual Focus (MF): As it gets darker, your camera’s autofocus might struggle. Switch to manual focus. Use your camera’s Live View screen, digitally zoom in on a distant point of light or the edge of a dune, and manually turn the focus ring until the image is perfectly sharp.
White Balance for Warm Tones
Your camera’s Auto White Balance often tries to “correct” the warm colors of a sunset, making them look cooler and less impressive.
- Use Presets: Switch your white balance setting to ‘Cloudy’ or ‘Shade’. These presets are designed for cooler light and will warm up your photos, enhancing the beautiful golden and orange tones of the Desert Safari Sunsets.
- Custom Kelvin: For ultimate control, set a custom Kelvin temperature. A value between 6000K and 7500K will introduce beautiful warmth into your images.
File Formats: RAW vs. JPEG
This is a crucial decision.
- JPEG: JPEGs are smaller, processed files. The camera makes permanent decisions about color, contrast, and sharpening.
- RAW: A RAW file is like a digital negative. It captures all the data from the sensor, giving you complete flexibility to edit the photo later. You can recover seemingly lost details in the highlights and shadows, adjust the white balance, and fine-tune colors without losing quality. For Desert Safari Sunsets, shooting in RAW is non-negotiable if you want the best possible images. A great place to experience this firsthand is through a photography-focused trip, like those offered at https://royaldesertadventures.ae/.
Composition Techniques to Elevate Your Sunset Photos
A technically perfect photo can still be boring if the composition is weak. Use these classic rules to create visually compelling images of Desert Safari Sunsets.
The Rule of Thirds in the Desert
Imagine your frame is divided into a 3×3 grid. The rule of thirds suggests placing key elements along these lines or at their intersections.
- Placing the Horizon: Avoid placing the horizon in the center of the frame. If the sky is dramatic and colorful, place the horizon on the bottom third to emphasize the sky. If the foreground dunes have interesting textures and shadows, place the horizon on the top third to showcase the land.
Leading Lines and Natural Frames
- Leading Lines: Use the natural curves and ridges of the dunes to act as leading lines. These lines guide the viewer’s eye through the image, often from the foreground toward the setting sun or another point of interest, creating depth and a sense of journey.
- Natural Frames: Look for elements to frame your sunset. You could shoot through the legs of a camel or use the dark branches of a Ghaf tree to create a natural border around your main scene. This adds context and visual interest.
The Power of Silhouettes
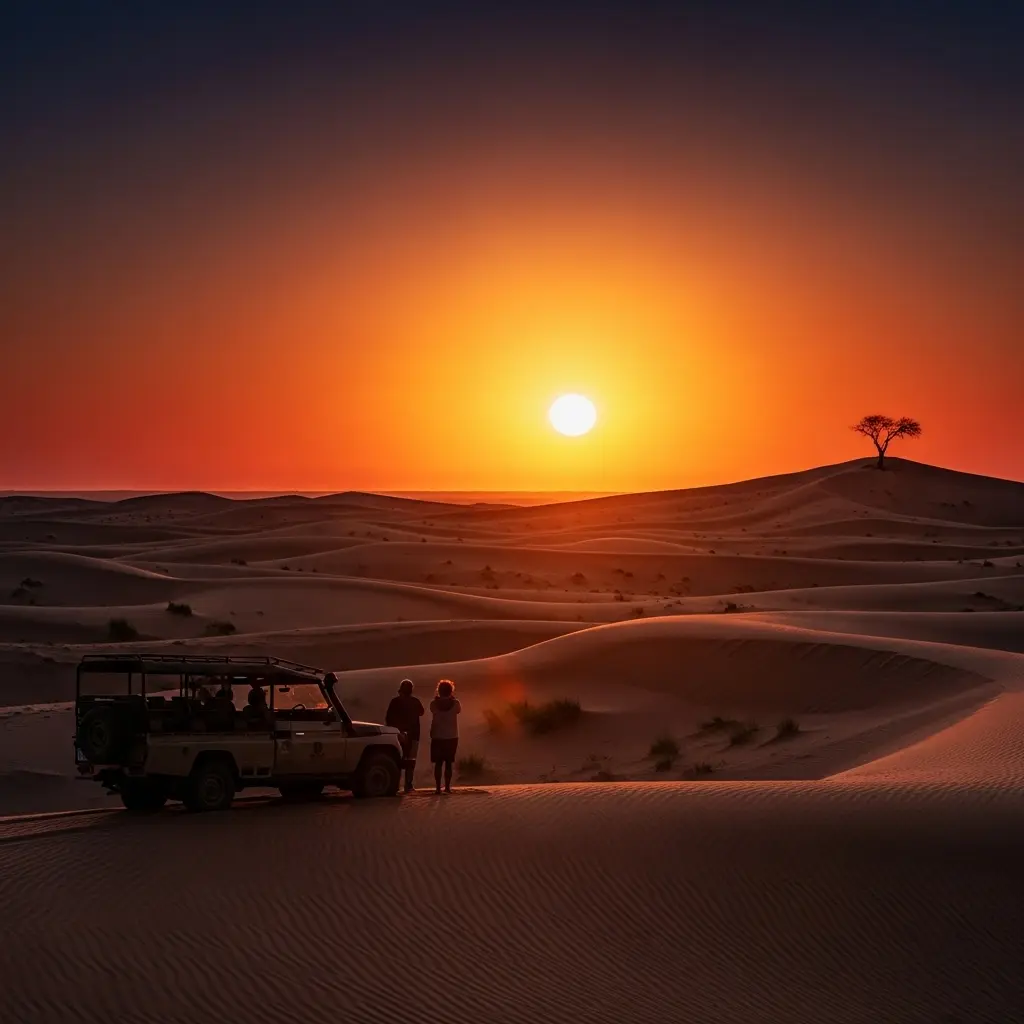
Desert Safari Sunsets provide the perfect backdrop for creating stunning silhouettes. A silhouette adds a powerful storytelling element and a clear focal point.
- How to Create Them: Position your subject (a person, camel, or vehicle) directly in front of the brightest part of the sky. Set your camera’s exposure based on the bright sky, not the subject. In Aperture Priority mode, you might need to use exposure compensation to dial it down (-1 or -2 stops). In Manual mode, simply use a faster shutter speed until your subject is completely black but the sky remains vibrant.
Capturing the Sunburst Effect
A sunburst or starburst effect, where the sun’s rays appear as distinct lines, can add a dazzling touch to your photos.
- Technique: Use a small aperture, such as f/16 or f/22. The smaller the aperture, the more defined the “points” of the starburst will be. Partially obscure the sun behind the edge of a dune or a camel. This helps to define the rays and prevents the sun from completely blowing out the highlights in your image.
Incorporating Human Elements
Adding people to your desert landscapes can provide a sense of scale and make the image more relatable.
- Candid Moments: Capture your friends or family enjoying the sunset. These authentic moments can be more powerful than posed shots.
- Sense of Scale: A small figure of a person standing on a massive dune can emphasize the sheer scale and grandeur of the desert, making the landscape feel even more immense and awe-inspiring.
A Step-by-Step Timeline for Your Photoshoot
Timing is everything when shooting Desert Safari Sunsets. The light changes incredibly fast, and you need to be prepared to capture each phase.
The Golden Hour: Before the Sun Sets
This is the hour right before sunset. The light is soft, warm, and directional, creating long, beautiful shadows.
- Arrive Early: Don’t wait until the sun is touching the horizon. Arrive at your location at least an hour beforehand.
- Scout Your Location: Use this time to walk around, find the best compositions, and set up your gear. Look for interesting foregrounds and clean backgrounds.
- Capture the Light: Start shooting. The golden light is perfect for portraits and for capturing the warm textures of the sand.
The Main Event: Capturing the Sunset
This is the period when the sun is on or very near the horizon. It happens quickly, so be ready.
- Bracket Your Exposures: Your camera’s meter can be fooled by the bright sun. Bracketing means taking three or more photos at different exposures (e.g., one normal, one darker, one brighter). This ensures you get at least one perfectly exposed shot and provides files that can be blended for HDR images later.
- Shoot, Shoot, Shoot: The sky’s colors can change dramatically from one minute to the next. Don’t just take one picture and call it a day. Continuously shoot and adjust your composition as the light evolves.
The Blue Hour: After the Sun Disappears
Many photographers make the mistake of packing up as soon as the sun is gone. The show is not over.
- Stay Put: The 20-30 minutes after sunset, known as the blue hour or twilight, is magical. The sky can erupt in a “second sunset” with intense pink and purple hues.
- Deep Colors: The light becomes soft and even, and the sky takes on a deep, rich blue color. This is a fantastic time for serene landscapes.
- Long Exposures: You will definitely need your tripod now. This is an opportunity to take long exposures, smoothing out any clouds and creating a dreamy, ethereal effect in your photos of the post-Desert Safari Sunsets sky.
Advanced Tips and Creative Ideas
Once you’ve mastered the basics, try these creative techniques to make your photos stand out.
Creating Panoramas
A standard photo often can’t capture the immense scale of the desert. A panorama is the solution.
- Technique: Set your camera to Manual mode to lock in the exposure. Turn your camera vertically on your tripod. Take a series of overlapping shots (about 30% overlap), panning the camera across the scene. Later, you can use software like Adobe Lightroom to automatically stitch these photos together into one epic, high-resolution panorama.
Time-Lapse Photography
A time-lapse is a video created from hundreds or thousands of still photos. It’s a powerful way to show the progression of the entire sunset.
- How to Do It: You’ll need a tripod and an intervalometer (many cameras have this built-in). Set your camera to take a photo every 5-10 seconds for the duration of the sunset. This requires a lot of patience and battery power but results in a truly dynamic final product.
Using Lens Flare Creatively
While often avoided, lens flare can be used as a beautiful, artistic element when shooting into the sun.
- Embrace It: Shoot with the sun just outside the frame or partially blocked by your subject. Different lenses and apertures will produce different flare patterns. Experiment to see what you can create. It can add a warm, dreamy, and authentic feel to your images of Desert Safari Sunsets.
Post-Processing Your Sunset Photos
Editing is where you bring your creative vision to life. The goal is not to create something fake but to enhance the beauty that was already there.
Basic Adjustments in Lightroom or Photoshop
- Exposure and Contrast: Fine-tune the overall brightness and contrast to make the image pop.
- Highlights and Shadows: This is where shooting in RAW pays off. You can recover details in the brightest parts of the sky (highlights) and bring out textures in the dark foreground (shadows).
- White Balance: If you didn’t get it perfect in-camera, now is the time to adjust the white balance to ensure the colors look natural and warm.
- Vibrance and Saturation: Use these tools carefully. Vibrance is often better as it boosts muted colors more than already saturated ones. A little goes a long way; don’t create an unrealistic, overly colorful image. Many tour operators, like those found on https://dubaidesertsafarie.com/, showcase beautifully processed images that can serve as inspiration.
Enhancing Colors and Tones
- HSL/Color Sliders: This panel gives you precise control over the Hue, Saturation, and Luminance (brightness) of individual colors. You can make the oranges richer, the yellows brighter, and the purples deeper without affecting the rest of the image.
- Split Toning: This advanced tool allows you to add a specific color tint to the highlights and a different one to the shadows, which can create a very cinematic and professional look for your Desert Safari Sunsets photos.
Common Mistakes to Avoid
Steer clear of these common pitfalls to improve your sunset photography instantly.
Choosing the Right Desert Safari for Photography
Not all desert safaris are created equal, especially for photographers.
- Timing is Key: Some tours are rushed and may only arrive at the camp just as the sun is setting, giving you very little time. Look for operators that specialize in photography tours or offer private packages. A private tour from a provider like https://hafiztourism.com/ can allow you to dictate the schedule, ensuring you have ample time during the golden and blue hours.
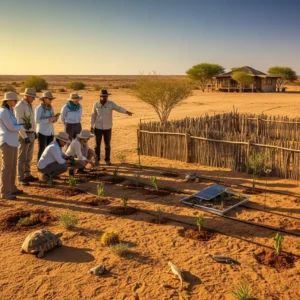
- Location Matters: Ask about the location. You want a spot with pristine, rolling dunes and minimal distractions. A conservation reserve often provides the best landscapes.
- Group Size: Smaller groups are better for photography. You’ll have more freedom to move around and set up your tripod without getting in other people’s way. A well-organized tour from a company like https://royaldesertadventures.ae/ can make all the difference in your experience.
The captivating beauty of Desert Safari Sunsets offers an unparalleled opportunity for photographers to capture breathtaking images. By combining the right gear, mastering your camera settings, and applying thoughtful composition, you can move beyond simple snapshots to create truly memorable photographs. Remember to prepare for the conditions, be patient as the light changes, and most importantly, stay after the sun disappears. With these tips in hand, you are ready to capture the soul-stirring magic of the Arabian desert at dusk.
Frequently Asked Questions (FAQs)
1. Do I absolutely need a DSLR camera to get good sunset photos in the desert? No, you do not absolutely need a DSLR. While DSLRs and mirrorless cameras offer the most control and highest image quality, modern smartphones are incredibly capable. If using a smartphone, the most important things you can do are to enable RAW photo capture (often found in “Pro” mode or through a third-party app), use a small tripod to keep the phone steady for sharp images in low light, and manually control the exposure to avoid blowing out the bright sky. The key is understanding photographic principles, not just owning expensive gear.
2. What is the single most important camera setting for Desert Safari Sunsets? While all elements of the exposure triangle are important, the most critical setting to get right is your Aperture. For a vast desert landscape, you’ll typically want a large depth of field to ensure everything from the sand ripples at your feet to the distant dunes is sharp. Setting your camera to Aperture Priority (Av) mode and choosing an aperture between f/8 and f/14 is the best starting point. This lets you control the sharpness and “look” of the image while the camera helps by selecting an appropriate shutter speed.
3. How do I protect my camera gear from sand and dust? Protecting your gear is crucial. Keep your camera in a sealed camera bag until you are ready to shoot. Avoid changing lenses out in the open wind; do it in a sheltered area like a car if possible. If you must change lenses, turn your back to the wind and do it as quickly as possible. A simple UV filter on your lens can protect the front element from scratches. Always have an air blower and a microfiber cloth to clean your gear before packing it away.
4. What is “bracketing” and why is it useful for sunsets? Bracketing is a technique where the camera takes multiple pictures of the same scene at different exposure levels. Typically, you would set it to take three shots: one at the “correct” exposure according to the camera’s meter, one underexposed (darker), and one overexposed (brighter). This is incredibly useful for Desert Safari Sunsets because the high contrast between the bright sky and dark land can fool the camera’s meter. Bracketing guarantees that you’ll have at least one usable exposure. It also provides the necessary files to create a High Dynamic Range (HDR) image in post-processing, which combines the best-lit parts of all three photos into a single, perfectly exposed image.
5. How do I create those sharp, black silhouettes of camels or people? Creating a silhouette is about exposure control. First, position your subject so that the bright, colorful sunset is directly behind them. Then, you need to tell your camera to expose for the bright sky, not the subject. The easiest way is to use Manual (M) mode. Set your aperture (e.g., f/8) and ISO (e.g., 100), then adjust your shutter speed until the sky looks vibrant and colorful, which will naturally render your subject as a dark, detailed silhouette. If using Aperture Priority, point your camera at the sky, note the settings, then use Manual mode to input them.
6. Should I use my camera’s flash during a desert sunset? Generally, you should turn off your flash. A flash is useless for illuminating a distant landscape and will ruin the natural ambient light. However, there is one creative exception: if you are taking a portrait of a person with the sunset behind them and you want both the person and the sky to be properly lit, you can use a technique called “fill flash.” This uses a small pop of flash to illuminate your subject in the foreground while the camera’s main exposure is set to capture the beautiful background. It requires practice but can yield great results.
7. What is the difference between the Golden Hour and the Blue Hour? The Golden Hour is the period shortly after sunrise or before sunset, where the daylight is redder and softer than when the Sun is higher in the sky. For Desert Safari Sunsets, this is the hour before the sun touches the horizon. It’s characterized by warm, golden light and long shadows, perfect for landscapes and portraits. The Blue Hour is the period of twilight in the morning or evening when the sun is a significant distance below the horizon and the residual, indirect sunlight takes on a predominantly blue hue. This occurs roughly 20-30 minutes after the sun has set and is prized for its cool, serene, and moody light.
8. Is a telephoto or wide-angle lens better for sunset photos? They serve different, equally important purposes, so ideally, you would have both. A wide-angle lens (e.g., 16-35mm) is crucial for capturing the epic scale of the desert, allowing you to fit the vast dunes and the massive sky into one frame. A telephoto lens (e.g., 70-200mm) is used for a different effect. It compresses the perspective, which can make the sun appear gigantic behind a distant camel or mountain. It’s also great for isolating interesting details in the landscape that a wide-angle lens would miss.
9. How do I get the “sunburst” effect in my photos? The sunburst or starburst effect is achieved by using a very small aperture. Set your camera’s aperture to f/16, f/18, or even f/22. The smaller the opening, the more pronounced the effect will be. The trick is to partially block the sun with an object, like the horizon line, the edge of a dune, or a person’s shoulder. This helps define the “rays” of the starburst and prevents the sun from being a completely overexposed white blob in your photo.
10. Why do my sunset photos look dull and flat on my camera screen? This is often because you are shooting in RAW format, which is the correct approach. A RAW file is an unprocessed image that contains all the sensor data. It’s intentionally designed to look flat and low-contrast on the screen, preserving the maximum amount of information for editing. The vibrant, punchy look you’re after is achieved in post-processing software like Lightroom or Photoshop, where you will adjust the contrast, saturation, and colors to match your memory of the scene.
11. What is the best white balance setting for warm sunset colors? Do not use Auto White Balance (AWB). AWB will try to neutralize the warm colors of the sunset, making your photo look cooler and less impressive. To enhance the warm tones, switch your white balance preset to ‘Shade’ or ‘Cloudy’. These settings are calibrated for cooler light, so they will add warmth back into the scene, making your oranges, reds, and yellows much richer and more vibrant, better representing the beauty of Desert Safari Sunsets.
12. How do I find interesting compositions in a seemingly empty desert? The beauty of the desert is in its minimalism. Look for simple, powerful shapes. The S-curves of dune ridges make for fantastic leading lines. A single, isolated tree or a set of animal tracks can become a powerful focal point. Pay close attention to light and shadow; the interplay between them creates texture and depth. Look for patterns in the windswept sand. The “emptiness” is your canvas for creating clean, uncluttered, and impactful compositions.
13. Should I focus on the foreground or the sky? For landscape photography, the goal is usually to have as much of the scene in focus as possible. By using a smaller aperture (like f/11), you increase the depth of field. The best practice is to focus about one-third of the way into the scene. This technique, known as focusing to the hyperfocal distance, maximizes the sharpness from your immediate foreground to the distant horizon. Avoid focusing on the sky itself, as it lacks contrast and might confuse your camera.
14. My photos are always blurry. What am I doing wrong? Blurry sunset photos are almost always caused by camera shake combined with a slow shutter speed. As the light fades, your camera needs to keep the shutter open for longer to gather enough light. Any tiny movement during this time will result in blur. The solution is threefold: use a sturdy tripod, use a remote shutter release or your camera’s 2-second timer to avoid shake from pressing the button, and if you are still hand-holding, increase your ISO slightly to allow for a faster shutter speed.
15. Is it better to underexpose or overexpose sunset photos? It is always better to slightly underexpose a digital photo than to overexpose it. When you overexpose, the brightest parts of the image (like the sun or the sky around it) can become “clipped,” meaning all the detail is lost and turns into pure white. This lost detail can never be recovered. If you slightly underexpose, the image might look dark, but the details are still there in the shadows and can be brightened during post-processing when shooting in RAW.
16. How can I add a sense of scale to my desert photos? The desert’s vastness can be hard to convey in a photograph. The best way to show scale is to include an object of a known size in the frame. A person standing on top of a dune, a distant 4×4 vehicle, or a camel train all work perfectly. By placing these familiar elements within the massive landscape, you give the viewer’s brain a reference point, which immediately makes the dunes and the sky feel immense and awe-inspiring.
17. What time should I arrive for a sunset photoshoot? You should plan to arrive at your photography spot at least 60 to 90 minutes before the official sunset time. This gives you plenty of time to unpack your gear, scout for the best compositions without being rushed, and meter the light. More importantly, the hour leading up to the sunset is the Golden Hour, which provides some of the best light of the entire day. Arriving early ensures you don’t miss this incredible opportunity.
18. What are “leading lines” and how do I use them in the desert? Leading lines are elements within a composition that draw the viewer’s eye from one part of the image to another, typically from the foreground to the background. They are a powerful tool for creating a sense of depth and guiding the viewer to your focal point. In the desert, the ridges of sand dunes are perfect natural leading lines. The tracks left by vehicles or animals also work wonderfully. Compose your shot so these lines start near the bottom of the frame and lead towards the setting sun or another point of interest.
19. How do I deal with the extreme contrast of a bright sky and dark foreground? This is the classic challenge of sunset photography. You have several options. The best in-camera solution is to use a Graduated Neutral Density (GND) filter, which is a piece of glass that is dark on top and clear on the bottom. You align the dark part with the sky to balance the exposure. The other common method is to take multiple bracketed exposures and merge them into an HDR photo later using software, which combines the best-exposed parts of each shot.
20. My sunset photos don’t look as vibrant as what I saw. How can I fix this in editing? This is a very common issue and is the primary purpose of post-processing. Your eyes have a much greater dynamic range than a camera sensor. To bring back the vibrancy, use the HSL (Hue, Saturation, Luminance) panel in your editing software. Instead of increasing the overall saturation, which can look unnatural, selectively boost the saturation and luminance of the specific colors of the sunset, such as the oranges, reds, and yellows. A slight increase in contrast and careful adjustment of the highlights and shadows will also help make the image pop and better reflect the spectacular reality you witnessed.
