
Desert Photography Tips: Mastering the Art of the Golden Sands in Dubai
Desert Photography Tips are the foundation of any great travel gallery when visiting the UAE. The desert is a beautiful but difficult place to shoot because of the extreme light and the fine sand that gets into everything.
Using proper Desert Photography Tips allows you to turn a simple holiday snap into a professional-looking piece of art. In 2026, camera technology has improved, but the rules of composition remain the same.
If you are looking for the best Desert Photography Tips, you need to start with understanding the landscape. The desert isn’t just a pile of sand; it is a canvas of textures and shadows that change every minute.
Most tourists fail to apply basic Desert Photography Tips, resulting in washed-out sky and flat-looking dunes. We are here to change that so your memories look as vivid as the actual experience.
Mastering the Golden Hour Magic
The most important of all Desert Photography Tips is timing. The “Golden Hour” occurs shortly after sunrise and just before sunset when the light is soft and warm.
During this time, Desert Photography Tips suggest focusing on the long shadows cast by the dunes. This creates a 3D effect that makes your images pop off the screen.
If you miss this window, the sun becomes too harsh. Following Desert Photography Tips for midday shooting usually involves using a polarizing filter to manage the intense glare.
Internal links like https://saharadesertsafaridubai.com/ provide tours specifically timed for these lighting conditions. Their expertise in the Desert Photography Tips workflow ensures you are in the right spot at the right time.
Protecting Your Gear from the Elements
One of the most practical Desert Photography Tips involves equipment safety. The desert wind carries fine silica that can scratch your lens and ruin your internal sensors.
Expert Desert Photography Tips recommend never changing your lens in the open air. If you must change it, do it inside the vehicle or under a protective cloth.
Checking out resources like https://royaldesertadventures.ae/ can help you see how the pros handle their gear. Their Desert Photography Tips for gear maintenance are essential for long-term camera health.
A simple but effective piece of Desert Photography Tips advice is to use a UV filter. It’s much cheaper to replace a scratched filter than a professional lens after a day in the dunes.
Composition and the Rule of Thirds
Great Desert Photography Tips aren’t just technical; they are about the eye. Use the “Rule of Thirds” to place the horizon on the top or bottom line of your grid.
In a Desert Photography Tips context, placing a lone camel or a person in the corner of the frame gives a sense of scale. It shows how massive the desert truly is.
Leading lines are another great addition to your Desert Photography Tips toolkit. Use the crest of a dune to lead the viewer’s eye through the entire photograph.
For those looking for high-end inspiration, https://dubaidesertsafarie.com/ showcases galleries built on these Desert Photography Tips. Their shots perfectly balance the sky and the sand.
Managing Exposure in the Bright Sun
Exposure is a tricky part of Desert Photography Tips because the sand acts like a giant reflector. Your camera might try to underexpose the shot, making the sand look grey.
Pro Desert Photography Tips suggest overexposing by one or two stops to keep the sand looking bright and golden. This is a classic trick for any bright environment.
Always keep an eye on your histogram. According to Desert Photography Tips, you want a balanced curve that doesn’t “clip” the whites, which would lose all detail in the highlights.
If you are using a mobile phone, Desert Photography Tips recommend tapping on the bright part of the sky and sliding the exposure bar down slightly to maintain the clouds.
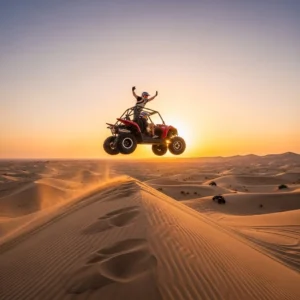
Capture the Action of Dune Bashing
A Desert Photography Tips guide wouldn’t be complete without covering action shots. To freeze the sand flying off the tires, you need a high shutter speed.
Set your camera to at least 1/1000 of a second. These Desert Photography Tips ensure that every grain of sand is sharp and clear as the 4×4 climbs the ridge.
For the most dramatic results, https://htdesertsafari.com/ suggests using burst mode. These Desert Photography Tips allow you to pick the exact millisecond where the car is at its peak height.
Perspective is also key in action-based Desert Photography Tips. Get low to the ground to make the vehicles look more powerful and the dunes look steeper.
Essential Equipment Checklist
| Item | Purpose | Why it fits Desert Photography Tips |
| Polarizing Filter | Reduces glare | Enhances blue sky and sand color |
| Air Blower | Cleaning | Removes dust without scratching |
| Tripod | Stability | Perfect for low-light sunset shots |
| Prime Lens | Sharpness | Better quality for landscape portraits |
| Rain Cover | Protection | Keeps sand out of the camera body |
| Extra Batteries | Power | Heat drains batteries faster than normal |
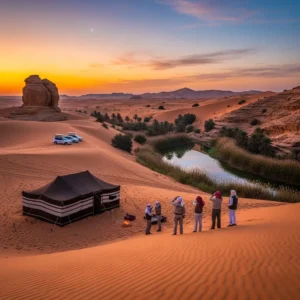
Capturing Cultural Details and Portraits
Don’t just shoot the sand; Desert Photography Tips include capturing the people. The portraits of falconers and traditional dancers add a human element to your story.
When shooting portraits, Desert Photography Tips suggest using a wide aperture (like f/2.8). This blurs the background and makes the subject stand out against the dunes.
Focusing on the eyes is the most vital of all Desert Photography Tips for people. It creates an emotional connection that a wide-angle landscape shot cannot provide.
Many tours offered at https://royaldesertadventures.ae/ include cultural displays. Using these Desert Photography Tips during a falconry session will result in truly iconic images.
Post-Processing and Editing Tricks
The journey of Desert Photography Tips continues after the shoot. Editing is where you bring out the hidden colors of the Arabian sands.
According to Desert Photography Tips, you should boost the “Warmth” or “Saturation” slightly. This mimics the feeling of the heat and the glow of the sun.
Avoid over-sharpening your images. Modern Desert Photography Tips warn that too much sharpening makes the sand look like digital noise rather than a natural texture.
Local adjustment brushes are a favorite in Desert Photography Tips. Use them to darken the sky while keeping the foreground sand bright and inviting.
Wildlife Photography in the Dunes
Spotting an Oryx or a Gazelle is rare, so your Desert Photography Tips must be ready. You need a long telephoto lens to capture them from a distance without scaring them.
Patience is the core of wildlife-related Desert Photography Tips. You might have to wait in silence for twenty minutes to get the perfect shot of a desert fox.
Keep your camera on “Continuous Focus.” These Desert Photography Tips ensure that if the animal moves, the lens stays locked on its position for a sharp result.
Operators like https://dubaidesertsafarie.com/ know the best spots for wildlife. Following their Desert Photography Tips during a morning safari gives you the best light for these animals.
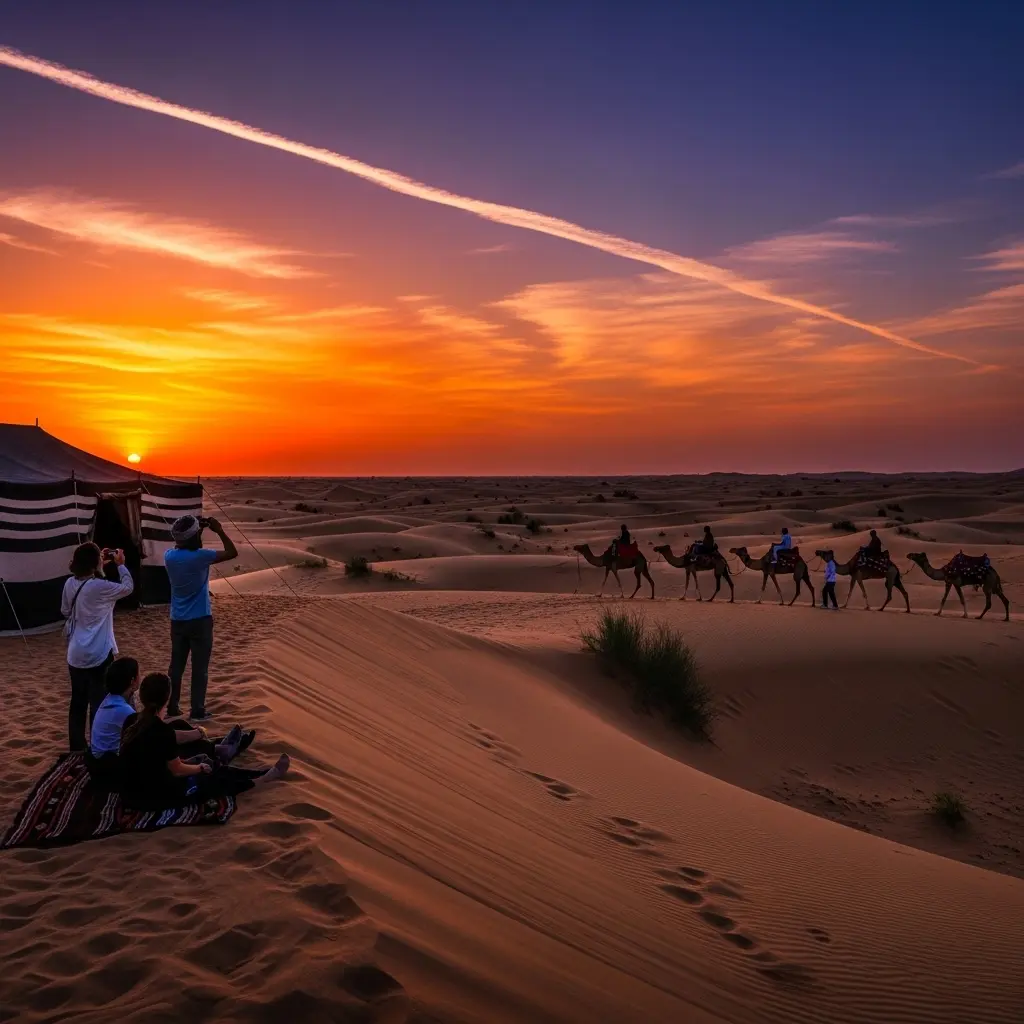
The Importance of Silhouette Shots
When the sun is very low, Desert Photography Tips recommend trying silhouette shots. This is done by exposing for the bright sky rather than the subject.
A person standing on a dune or a camel caravan looks amazing as a black outline against a red sky. These Desert Photography Tips create a timeless, cinematic feel.
Ensure the shapes are clean. Professional Desert Photography Tips suggest making sure the subjects aren’t overlapping too much, so their outlines remain distinct.
This is a great technique for social media. These Desert Photography Tips result in high-contrast images that stand out in a busy feed of standard travel photos.
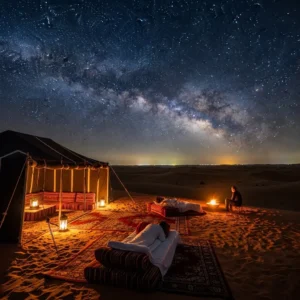
Night Photography and the Stars
Once the sun is gone, Desert Photography Tips shift toward long exposures. The desert is one of the few places with low enough light pollution to see the Milky Way.
Use a tripod and a slow shutter speed (around 20 seconds). These Desert Photography Tips allow the camera to soak up the faint light from distant stars.
Check out https://htdesertsafari.com/ for their night safari options. Their Desert Photography Tips for astrophotography include using a wide-angle lens to capture the full sky.
Light painting is another fun part of Desert Photography Tips. Use a flashlight to gently “paint” the foreground dunes while the shutter is open to add depth to the darkness.
Using Your Smartphone for Pro Results
You don’t need a $5000 camera to follow Desert Photography Tips. Most modern smartphones are capable of incredible desert imagery if used correctly.
Turn on the “Grid” feature. These Desert Photography Tips help you keep your horizon straight, which is the most common mistake in amateur desert photography.
Use the “Portrait Mode” for more than just people. According to Desert Photography Tips, this mode can create a beautiful depth of field on desert flowers or sand ripples.
Don’t zoom in digitally. Desert Photography Tips for mobile users suggest walking closer to the subject or cropping the image later to maintain the highest resolution.
Planning the Perfect Shoot Route
Not all parts of the desert are the same. Desert Photography Tips involve choosing a location that has “virginal” sand—dunes without tire tracks or footprints.
Following the internal link https://saharadesertsafaridubai.com/ will lead you to more remote areas. These locations are the “Holy Grail” for Desert Photography Tips because of their pristine condition.
Early morning is often better for clean sand. Overnight winds smooth out the tracks, providing a fresh canvas for your Desert Photography Tips to shine.
Talk to your driver. They often have their own Desert Photography Tips and know hidden spots that aren’t on the standard tourist path.
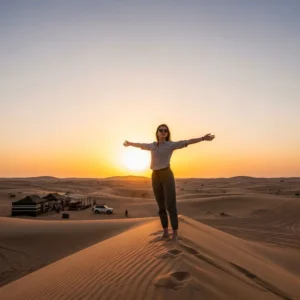
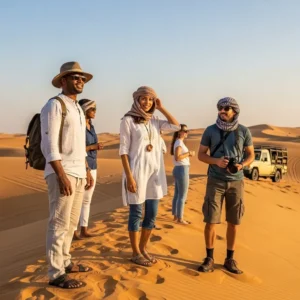
The Human Element in the Landscape
Scale is the hardest thing to capture in the desert. Desert Photography Tips suggest including a person in the frame to show how small we are compared to nature.
Clothing choice is a sub-category of Desert Photography Tips. Bright colors like red or blue contrast beautifully against the orange sand and blue sky.
Avoid busy patterns. Simple, solid colors work best with Desert Photography Tips as they don’t distract from the natural beauty of the desert landscape.
If you are shooting for a brand or an influencer, these Desert Photography Tips are essential for creating a professional and cohesive aesthetic for your profile.
Dealing with Heat and Camera Lag
Heat can cause your camera to overheat and shut down. Desert Photography Tips suggest keeping your gear in the shade of the vehicle whenever you aren’t shooting.
If your camera feels hot, don’t put it directly in front of the AC. These Desert Photography Tips warn that rapid temperature changes can cause condensation inside the lens.
Keep spare batteries in a cool place. Following Desert Photography Tips for battery management ensures you don’t run out of power just as the sunset reaches its peak.
Many travelers use https://royaldesertadventures.ae/ for their extended photography tours. They provide the support needed to follow these Desert Photography Tips over a full day of shooting.
Capturing the Textures of the Sand
Close-up shots are an underrated part of Desert Photography Tips. The patterns created by the wind on the surface of the sand are mesmerizing.
Get as close as possible. Using macro Desert Photography Tips allows you to see the individual grains and the delicate ridges formed by the breeze.
Side-lighting is the key to these shots. These Desert Photography Tips emphasize the “peaks and valleys” of the sand ripples, creating a dramatic, abstract image.
These detail shots are perfect for “filler” photos in a travel blog or gallery. They provide a sense of place that goes beyond the standard wide-angle view.
Frequently Asked Questions
1. What is the single best time for desert photography? The absolute best time for Desert Photography Tips is the “Golden Hour,” which is the period roughly 30 to 60 minutes before sunset. During this time, the sun is low on the horizon, creating a warm, golden glow and long, dramatic shadows. This lighting reveals the textures of the sand dunes and prevents the “flat” look that occurs during the middle of the day.
2. How do I prevent sand from ruining my camera? Preventing damage is a core part of Desert Photography Tips. You should never change your lens in the open desert. Use a protective “rain cover” even when it’s not raining to keep fine sand out of the buttons and dials. Additionally, always keep a UV filter on your lens; it is much easier to clean or replace a $50 filter than a $1000 lens if sand scratches the glass.
3. Do I need a tripod for a desert safari? While you can shoot handheld during the day, Desert Photography Tips highly recommend a tripod for sunset and night shots. As the light fades, your camera will need a slower shutter speed to get a good exposure. A tripod ensures your images remain sharp and blur-free. It is also essential if you want to try astrophotography or “light painting” in the desert after dark.
4. Why do my desert photos look grey instead of golden? This is a common issue that Desert Photography Tips can solve. Your camera’s light meter sees the bright sand and tries to “balance” it by making it darker, which results in a dull, grey look. To fix this, you should use exposure compensation and “overexpose” your shots by +1 or +2 stops. This tells the camera to let in more light, keeping the sand looking bright and vibrant.
5. What lenses should I bring on a Dubai safari? For the best results, Desert Photography Tips suggest a two-lens setup. A wide-angle lens (like a 16-35mm) is perfect for capturing the vastness of the landscape and the massive dunes. A telephoto lens (like a 70-200mm) is great for “compressing” the dunes to make them look steeper and for capturing wildlife or people from a distance without disturbing them.
6. Is a smartphone good enough for desert photography? Yes, modern smartphones are excellent for following Desert Photography Tips. Most have high-quality sensors and built-in HDR that handles the bright sky and dark shadows well. To get pro results, use the “Pro” or “Manual” mode to control your ISO and shutter speed. Also, remember the Desert Photography Tips regarding composition—use the grid lines to keep your horizon straight.
7. How do I capture the “sparkle” in the sand? To capture the sparkling grains of sand, Desert Photography Tips recommend shooting toward the sun (backlighting). When the sun is at a low angle, its light hits the individual quartz crystals in the sand, making them glisten. Be careful with your exposure here; you may need to shield your lens from direct flare to maintain contrast while catching the sparkle.
8. What should I wear for a photography-focused safari? While this isn’t about the camera, it’s an important part of Desert Photography Tips. Wear light, breathable clothing that protects you from the sun. If you want to be in the photos, wear bright, solid colors like red, yellow, or royal blue. These colors contrast perfectly with the orange and tan hues of the desert, making you stand out in the frame.
9. Can I fly a drone in the Dubai desert for photos? Drones are a popular part of modern Desert Photography Tips, but there are strict laws in Dubai. You must have a permit and follow “No Fly Zone” regulations. Many desert areas are near flight paths or military zones. Always check with your Desert Photography Tips provider or a local authority before launching a drone to avoid heavy fines or equipment confiscation.
10. How do I take good photos of the live shows at the camp? For the evening performances, Desert Photography Tips suggest using a fast shutter speed to freeze the motion of the dancers. Since it will be dark, you will need to increase your ISO (to 1600 or 3200). If you want to capture the “light trails” of a fire dancer, use a slower shutter speed (1/10 of a second) and a tripod to keep the background sharp while the fire blurs.
11. What is the “Rule of Thirds” in desert photography? This is a fundamental of Desert Photography Tips. Imagine your frame is divided into a 3×3 grid. Instead of putting the horizon in the middle, place it on the top or bottom line. Instead of putting your subject in the dead center, place them where the lines intersect. This creates a more balanced and visually interesting image that feels more professional.
12. Should I shoot in RAW or JPEG? Professional Desert Photography Tips almost always recommend shooting in RAW. The desert has a massive “dynamic range” (the difference between the brightest highlights and darkest shadows). A RAW file contains much more data, allowing you to recover details in the sky or the shadows during editing that would be lost forever in a standard JPEG file.
13. How do I take a good silhouette photo? To take a silhouette, Desert Photography Tips say you should find a subject (like a person or a camel) and place them between you and the setting sun. Point your camera at the brightest part of the sky to set the exposure, then lock it and recompose. The sky will look beautiful and colorful, while your subject will be a sharp, black outline.
14. Are there any specific editing apps for desert photos? For mobile users, Desert Photography Tips recommend Lightroom Mobile or Snapseed. These apps allow for “Selective Adjustments,” meaning you can change the color of the sand without affecting the blue of the sky. In Lightroom, use the “Color Mix” tool to boost the oranges and yellows slightly to give the desert that iconic “Dubai” glow.
15. How do I get shots without other tourists in them? This is one of the most common Desert Photography Tips requests. The best way is to book a private safari or a “Photography Specific” tour through operators like https://saharadesertsafaridubai.com/. They can take you to dunes that are away from the main camp areas, ensuring you have a perfectly clean horizon with no other cars or people in your shot.
16. What is “lens flare” and how do I avoid it? Lens flare happens when direct sunlight hits the front element of your lens, creating spots of light or a hazy look. While some use it for artistic effect, most Desert Photography Tips suggest avoiding it. Use a lens hood (the plastic ring that clips onto the front) or simply use your hand to shadow the lens from the sun while you take the photo.
17. How do I show the height of the dunes? To make dunes look as big as they feel, Desert Photography Tips suggest getting as low to the ground as possible. This “worm’s eye view” makes the crest of the dune loom over the camera. Alternatively, include a person at the bottom of a large dune to provide a sense of scale, which immediately tells the viewer how massive the sand structure really is.
18. How do I take photos during a sandstorm? If a minor sandstorm occurs, Desert Photography Tips suggest focusing on the “mood.” The dust in the air creates a soft, hazy light that can look very cinematic. However, be extremely careful with your gear. Use a plastic bag or a dedicated camera sleeve, and do not change your lens. The wind-blown sand is a major threat to the glass and the internal mechanics.
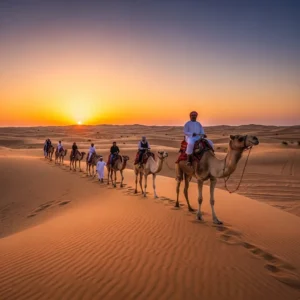
19. What is the best way to capture a camel caravan? For a caravan, Desert Photography Tips suggest a side-on view from a distance. Use a telephoto lens to “compress” the line of camels, making them look closer together. If you can, get ahead of the caravan so they are walking toward the sunset. This creates a powerful, iconic image of traditional desert travel that is a staple of Arabian photography.
20. Is it okay to take photos of local people? Respect is the most important of all Desert Photography Tips. In the UAE, it is polite to ask for permission before taking a photo of a local person, especially women. Most falconers and camp staff are happy to pose for a photo if you ask nicely. Following this cultural tip ensures you have a positive experience while building your travel gallery.