Beyond the Snapshot: Creating Unforgettable Instagram-Worthy Desert Safari Photos
Creating stunning desert safari photos goes far beyond simply pointing your camera at a dune. It’s an art form that blends the raw beauty of the Arabian desert with a photographer’s vision, turning fleeting moments into captivating digital stories. In a world dominated by visual content, a desert safari offers a golden opportunity to fill your Instagram feed with images that stop the scroll and inspire wanderlust.
The allure is undeniable: the warm, endless sea of sand, the dramatic play of light and shadow, and the vibrant cultural experiences. But capturing this magic requires more than just luck. It demands a thoughtful approach, combining careful planning, the right techniques, and a dash of creative flair. This is your guide to transforming your desert adventure, perhaps one booked through https://royaldesertadventures.ae/, into a portfolio of breathtaking images.
We will explore everything from choosing the perfect outfit and timing your shots with the sun, to mastering composition and posing. Prepare to move beyond basic snapshots and learn the secrets to producing professional-quality, Instagram-worthy desert safari photos that will leave your followers in awe.
The Foundation: Planning for Perfect Desert Safari Photos
The most incredible desert safari photos begin long before the camera is even turned on. Strategic planning is the bedrock upon which you build your visual narrative. From the time of day to the clothes on your back, every decision can dramatically impact the final outcome.
Choosing the Right Time of Day
Light is the single most important element in photography, and in the desert, it performs a spectacular daily show.
- The Golden Hour: This magical period, roughly the first hour after sunrise and the last hour before sunset, is the undisputed champion for photography. The sun is low in the sky, casting a soft, warm, golden light that is incredibly flattering. It creates long, dramatic shadows that accentuate the ripples and curves of the dunes, adding depth and texture to your desert safari photos.
- The Blue Hour: Don’t pack up your camera the moment the sun disappears. The “blue hour” is the brief window of twilight after sunset when the sky is filled with a cool, deep blue, often streaked with leftover pinks and oranges from the sunset. This light is soft, ethereal, and perfect for creating moody, serene portraits and landscapes.
- Navigating Midday Light: The sun at midday is directly overhead, creating harsh, unflattering shadows and bright, blown-out highlights. While challenging, you can still get interesting shots by focusing on graphic shadows, high-contrast black and white images, or finding shaded areas. However, for the classic, dreamy desert look, golden hour is non-negotiable.
Selecting the Right Safari Package
Not all safaris are created equal, especially for a photographer. To get the best desert safari photos, you need time.
- Prioritize Photography Time: When booking, look for tours that don’t rush you from one activity to the next. An ideal safari, like many offered by https://royaldesertadventures.ae/, will allocate specific time for sunset viewing and photography, allowing you to set up and get your shots without feeling hurried.
- Private vs. Group Tours: A private tour offers the ultimate flexibility. You can ask the driver to stop whenever you see a perfect photo opportunity and can spend as long as you need composing your shots. While more expensive, the investment can pay off in the quality of your images. Group tours are more budget-friendly but offer less control over the schedule.
What to Wear: Your Outfit as a Prop
Your clothing is not just about comfort; it’s a key compositional element in your desert safari photos.
- Color Palette: Think about how your outfit will contrast or harmonize with the orange and gold tones of the sand. Bright whites, deep reds, royal blues, or vibrant yellows can create a stunning pop of color that draws the eye. Alternatively, earthy tones like beige, cream, or olive green can create a more subtle, harmonious look.
- Flowing Fabrics: The desert wind is your friend. Choose lightweight, flowing fabrics—like long dresses, skirts, or scarves—that will catch the breeze. This creates a sense of movement and dynamism in your photos, turning a static pose into a captivating moment.
- Accessorize Wisely: A wide-brimmed hat, stylish sunglasses, or a traditional Arabic headscarf (ghutra) can add personality and a storytelling element to your portraits.
Essential Gear for Next-Level Desert Safari Photos
While modern smartphones are incredibly capable, a dedicated camera will give you the creative control and image quality needed to truly elevate your desert safari photos.
Beyond the Smartphone: Why a Dedicated Camera Wins
A DSLR or mirrorless camera offers three key advantages:
- Dynamic Range: The desert has extreme contrasts between bright highlights and deep shadows. A dedicated camera’s larger sensor can capture more detail in both these areas.
- RAW Files: Shooting in RAW format captures all the sensor data, giving you immense flexibility in post-processing to adjust colors, exposure, and details without losing quality.
- Lens Choice: The ability to change lenses opens up a world of creative possibilities that a fixed phone lens cannot match.
Lenses to Pack for a Desert Safari
The right lens helps you frame the desert’s grandeur in different ways.
- Wide-Angle Lens (16-35mm): This is your go-to for capturing the vast, sweeping landscapes and the immense scale of the desert. It’s perfect for placing a subject within the grand environment.
- Telephoto Lens (70-200mm): This lens is a secret weapon. It compresses the perspective, making distant dunes appear closer and more stacked, creating a powerful, layered effect. It’s also ideal for isolating subjects like a distant camel train or capturing action during dune bashing.
- Prime Lens (35mm or 50mm f/1.8): A prime lens with a wide aperture is perfect for portraits. It allows you to create that dreamy, professional look with a sharp subject and a beautifully blurred background (bokeh).
Must-Have Photography Accessories
These small tools can make a huge difference.
- Circular Polarizing Filter (CPL): This is arguably the most important filter for desert photography. It screws onto your lens and works by reducing glare and reflections from the sand. It also deepens the blue of the sky and increases color saturation, making your desert safari photos look more vibrant straight out of the camera.
- Sturdy Tripod: For the sharpest possible sunset, blue hour, and self-portrait shots, a tripod is essential. It eliminates camera shake during longer exposures in low light.
- Collapsible Reflector: A small, 5-in-1 reflector is a portable and powerful tool. The gold side can be used to bounce the warm sunset light back onto your subject’s face, filling in shadows and creating a beautiful, professional-looking glow.
- Lens Cleaning Kit: The desert is dusty and windy. A rocket blower, a soft brush, and microfiber cloths are non-negotiable to keep your lenses and sensor free of sand.
The “Must-Get” Shots: An Instagrammer’s Checklist
While spontaneous moments are wonderful, having a shot list ensures you come home with a variety of iconic and engaging desert safari photos.
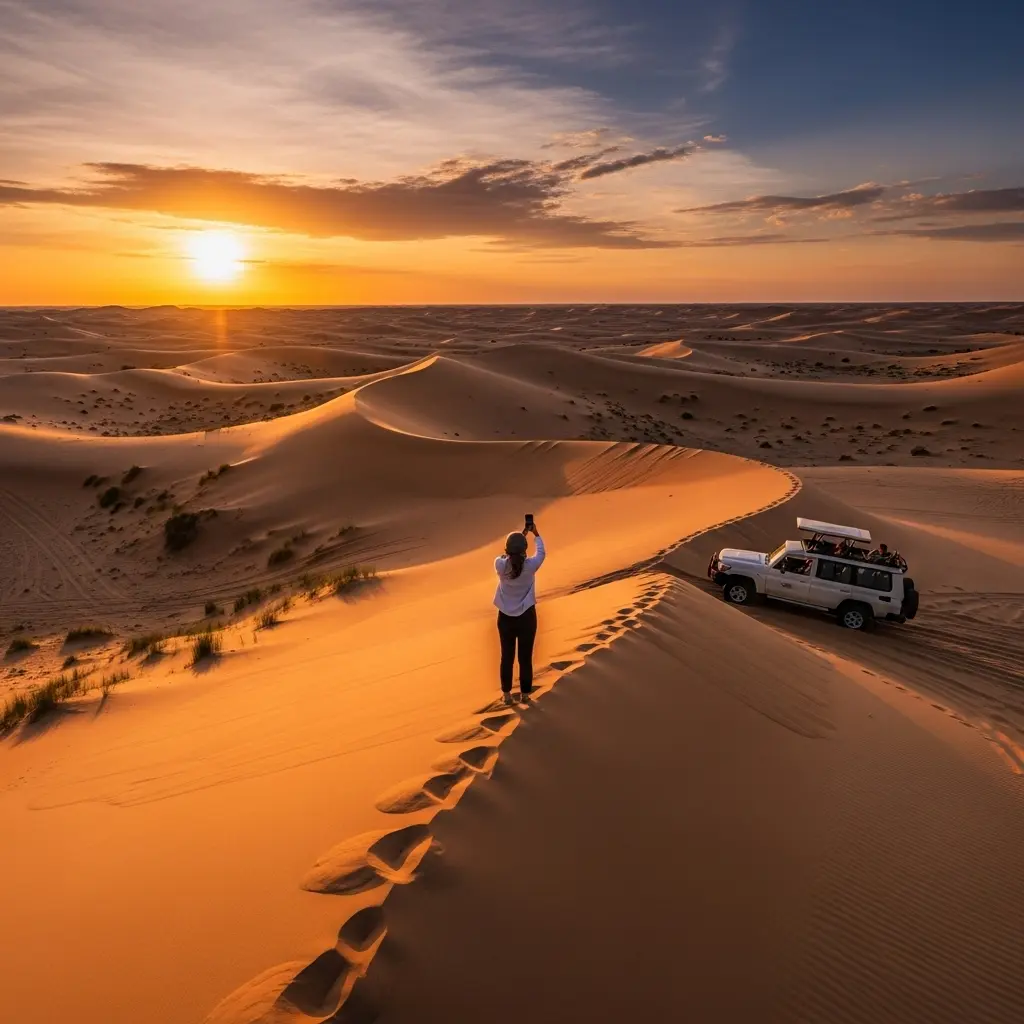
The Golden Hour Dune Walk
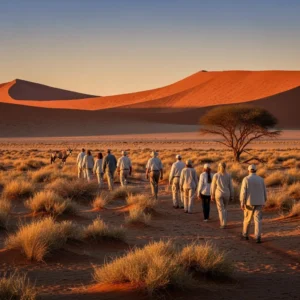
This is the quintessential desert shot. As the sun gets low, find a clean, windswept dune ridge.
- Posing and Action: Don’t just stand there. Create a sense of journey by walking along the crest of the dune, either towards or away from the camera. Have your subject look back over their shoulder. For a playful shot, try tossing a small amount of sand into the air, backlit by the sun.
- Composition: Use the sharp edge of the dune as a powerful leading line that guides the viewer’s eye. Position your subject at an intersection of the rule-of-thirds grid. Pay attention to the long, elegant shadows created by the low sun; they are subjects in themselves.
The Iconic Camel Ride Photo
A camel ride is a core part of the safari experience and offers fantastic photo opportunities.
- Vary Your Angles: Don’t just take the standard side-on shot. Get low to the ground and shoot upwards to make the camel look majestic. Capture close-up details: the intricate patterns on the saddle, the camel’s long eyelashes.
- Capture the Shadow: During the golden hour, the camel train will cast long, interesting shadows on the sand. A shot from above (if you can get to a higher dune) that features these shadows can be incredibly graphic and compelling.
- Show Interaction: Photos that show a connection are always more engaging. Capture a moment of your subject petting the camel or looking at it with a smile.
The Thrilling Dune Bashing Shot
Capturing the energy of dune bashing can be tricky but rewarding.
- From the Inside: Use a fast shutter speed to freeze the action and capture the expressions of excitement and adrenaline on your fellow passengers’ faces.
- From the Outside: The most dramatic shot is of the 4×4 vehicle carving through a dune, sending a plume of sand into the air. This requires coordination. Ask your driver if there will be a photo stop where one vehicle drives for the others to photograph. Use your camera’s burst mode to capture a rapid sequence of shots to ensure you get the peak moment of action.
The Serene Sunset Silhouette
As the sun touches the horizon, it’s time for silhouettes.
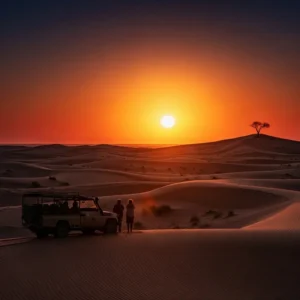
- Technique: Position your subject directly in front of the brightest part of the sky. Expose for the sky, not the subject. This will plunge your subject into deep shadow, creating a strong, graphic outline against the vibrant colors of the sunset.
- Posing: Silhouettes work best with recognizable shapes. Poses that create space, like a yoga pose (warrior II), holding hands with a gap between bodies, or a joyful jump, are more effective than standing straight on.
The Majestic Falconry Portrait
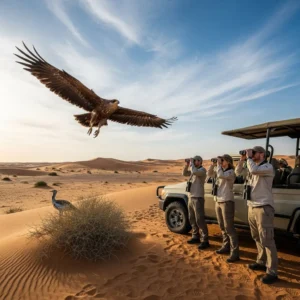
The falcon is a powerful symbol of Emirati heritage.
- Focus on the Eyes: Whether the bird is on the falconer’s glove or your own, make sure you focus sharply on the falcon’s eye. This creates a powerful connection with the viewer.
- Capture the Details: Use a shallow depth of field to blur the background and draw attention to the intricate details of the falcon’s feathers and the leather hood (burqa). A respectful portrait of the falconer also tells a rich cultural story.
The Bedouin Camp Experience
The safari camp itself is a treasure trove of photogenic moments.
- Cultural Details: Capture the intricate process of henna painting on hands, the wisps of smoke from a shisha pipe, and the vibrant colors of the traditional BBQ dinner.
- Firelight Ambiance: As night falls, use the warm, flickering light of the campfire and lanterns to create atmospheric portraits. This low light can be challenging, so use a wide aperture and a higher ISO to get good exposures.
Creating an Ambiance in Your Desert Safari Photos
To truly capture the camp’s atmosphere, slow down and observe. Look for the interplay of light and shadow cast by lanterns. Frame a shot of the stage through the audience. Use the textures of the carpets and cushions as foreground elements. These details add layers to your storytelling and make your desert safari photos richer.
Mastering Composition for Viral Desert Safari Photos
How you arrange the elements within your frame can make or break an image. Strong composition will draw viewers in and hold their attention.
The Power of Leading Lines
The desert is filled with natural lines. The crest of a dune, the tracks left by a 4×4, or even the line of a camel train can be used as powerful leading lines. Compose your shot so these lines start at the bottom of the frame and lead the viewer’s eye towards your main subject, creating a sense of depth and pulling them into the scene.
Framing Your Shot
Look for opportunities to create a frame within your frame. This adds depth and context. You could shoot through the window of the safari vehicle to frame a distant dune, use the archway of the camp entrance to frame the scene inside, or use two palm trees to frame the sunset.
Embracing Negative Space
In the desert, the vast, empty sky or a large, clean expanse of sand can be a powerful compositional tool. This “negative space” helps to simplify the image and make your main subject stand out. Don’t be afraid to place your subject small in the frame, surrounded by the grand emptiness of the desert, to emphasize a sense of scale and solitude.
Rule of Thirds in the Desert
Avoid the beginner’s mistake of placing the horizon or your subject dead center in every shot. Imagine your frame is divided by a tic-tac-toe grid. Place the horizon along the top or bottom line, and position your key subjects (a person, a camel) where the lines intersect. This creates a more dynamic and visually pleasing balance in your desert safari photos. Exploring other galleries for inspiration, like those on https://dubaidesertsafarie.com/, can help you see this rule in action.
Capturing Texture and Pattern
Get closer and look for details. The desert is rich with textures and patterns. The wind creates mesmerizing, repeating ripples in the sand. The coarse hair of a camel, the intricate weave of a Bedouin carpet, or the cracked, dry earth can all make for compelling abstract or detailed photographs that add variety to your feed.
Posing and Storytelling: How to Look Natural
The difference between a stiff, awkward photo and a captivating one often comes down to the pose and the story it tells.
Create and Capture Movement
Static poses can feel boring. The best way to look natural is to be in motion. Have your subject walk, run, or spin. A flowing dress or scarf will catch the wind and add an incredible sense of life and energy to the image. Use a fast shutter speed to freeze the motion or a slightly slower one to create an artistic blur.
Interact with Your Environment
Encourage your subject to connect with the desert. Have them run their hands through the sand, look out towards the distant horizon as if in contemplation, or sit on a dune and watch the sunset. These actions tell a story and result in photos that feel authentic and evocative.
The Art of the “Plandid”
The “plandid” shot—a planned candid—is a staple of Instagram. It’s a photo that looks like a spontaneous moment but was carefully directed. The key is to set up the composition and lighting, and then have the subject perform a natural action, like laughing, adjusting their hat, or walking through the frame, while you capture the moment.
Using Props Effectively
Props can enhance your storytelling. A beautifully patterned scarf can be held up to catch the wind. A traditional Arabic lantern can be held at dusk to create a warm glow. Even simple sunglasses or a hat can be used to interact with, adding a focal point and a sense of personality to your desert safari photos. Travel blogs, such as https://hafiztourism.com/, often showcase great examples of using props in travel photography.
Editing Your Photos for an Instagram Feed
Your creative process isn’t over when you put the camera away. Editing is the final step to make your photos pop and ensure they fit a consistent aesthetic.
Choosing Your Style: Presets and Filters
Decide on a consistent look for your desert safari photos. Many influencers favor the “orange and teal” color grade, which enhances the warm tones of the sand and the blue of the sky. Another popular style is a warm, golden, slightly desaturated look that feels timeless and cinematic. Using a consistent preset or filter across your photos will create a professional and cohesive grid.
Key Adjustments in Lightroom or Snapseed
Whether you’re using a professional desktop application or a mobile app, the key adjustments are the same:
- Exposure & Contrast: Ensure your photo is well-lit and has a good punch between light and dark areas.
- Highlights & Shadows: Recover detail by slightly lowering the highlights (for the bright sky) and raising the shadows (to see detail in darker areas).
- Color: Adjust the temperature to be warmer (more yellow/orange) and fine-tune individual colors using the HSL (Hue, Saturation, Luminance) panel.
- Clarity & Texture: Subtly increasing these can make the details in the sand and landscape stand out.
The Importance of a Cohesive Feed
Think about how your new desert safari photos will look next to each other on your Instagram grid. By using a similar editing style, you create a visual theme that is more appealing to followers. Plan your posts so that a wide landscape shot might be next to a close-up detail shot, creating visual variety while maintaining a consistent feel.
Conclusion
The Arabian desert is one of the most photogenic landscapes on Earth. By moving beyond simple point-and-shoot methods and embracing the principles of good photography, you can create a gallery of truly spectacular desert safari photos. It’s a combination of meticulous planning, technical understanding, and, most importantly, your unique creative voice. So book your adventure, charge your batteries, and get ready to capture the soul of the desert, one incredible, Instagram-worthy shot at a time.
Frequently Asked Questions (FAQs)
1. What’s the worst time of day for desert safari photos? The worst time is undoubtedly midday, typically from around 11 AM to 3 PM. During these hours, the sun is directly overhead, which creates very harsh, dark shadows on people’s faces (often called “raccoon eyes”) and eliminates the beautiful textures of the sand dunes, making them look flat and uninteresting. The intense contrast is difficult for cameras to handle, leading to either overly dark shadows or blown-out, detail-less highlights.
2. Can I get good photos with just an iPhone? Absolutely. Modern iPhones and high-end Android phones have incredibly sophisticated cameras. To get the best results, use Portrait Mode for flattering shots of people with blurred backgrounds. Make use of the wide-angle lens for landscapes. Most importantly, learn to use the manual controls for exposure—tap on the screen and drag the sun icon up or down to adjust brightness. This is crucial for properly exposing a bright sunset.
3. What colors should I avoid wearing in the desert? While there are no strict rules, it’s generally best to avoid wearing colors that are too similar to the sand, such as tan or certain shades of orange, as you might blend in too much. Black can be visually striking but absorbs a lot of heat, making it uncomfortable to wear. It’s often better to choose colors that either strongly contrast with or beautifully complement the desert landscape.
4. How do I protect my camera from sand and dust? This is critical. Avoid changing lenses out in the open where wind can blow dust directly onto your camera’s sensor. If you must change lenses, do it in a sheltered area like inside the 4×4. Keep a UV filter on your lens at all times to protect the front element. A simple rain cover or even a plastic bag can provide an extra layer of protection in very windy conditions. Use a rocket blower frequently to puff away any sand that settles on your gear.
5. Are drones allowed on desert safaris in Dubai? As a general rule, flying drones is heavily restricted in the UAE and is forbidden in most public areas and conservation reserves without special permits, which are very difficult to obtain for recreational use. Assume you cannot fly a drone on your desert safari. Attempting to do so can result in confiscation of the drone and significant fines. Always check the latest local regulations from the General Civil Aviation Authority (GCAA).
6. What are some unique photo ideas beyond the typical shots? Think abstractly. Focus on patterns and textures, like the close-up ripples in the sand. Play with shadows and create interesting shapes. Use a crystal ball or a prism to create unique reflections and light refractions. Another idea is a “follow me to” style shot, leading the viewer towards a beautiful dune or the safari camp.
7. How to take sharp photos during the bumpy dune bashing ride? This is very challenging. The key is to use a very fast shutter speed (1/1000s or faster) to freeze the motion and counteract the vehicle’s vibrations. Set your camera to burst mode to take many shots in a row, increasing your chances of getting a sharp one. Brace yourself as best you can, and try to anticipate the bumps to shoot during the smoother moments.
8. Best apps for editing desert safari photos? For mobile editing, Adobe Lightroom Mobile is the most powerful and professional choice, offering precise control over every aspect of your image. Snapseed by Google is another fantastic, free option with a great range of tools. For quick edits and trendy filters, apps like VSCO or Tezza are very popular among influencers.
9. How do I find the best sand dunes for pictures? This largely depends on your safari guide. Experienced guides who work for reputable companies like https://royaldesertadventures.ae/ know the most picturesque spots with pristine, “un-tracked” dunes. If you’re on a private tour, you can specifically request to be taken to a location with clean, sharp-edged dunes for the best photographic results.
10. Posing ideas for people who are not models? The best advice is to focus on action and interaction. Instead of just standing and smiling at the camera, have your subject walk away and look back, adjust their hat, look out at the horizon, or sit down and run their hands through the sand. Giving someone an action to perform helps them forget about the camera and results in much more natural-looking poses.
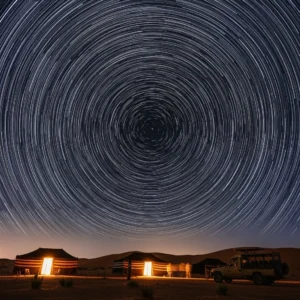
11. How to take great photos of the stars at the desert camp? The desert’s dark sky is amazing for astrophotography. You will absolutely need a tripod. Set your camera to manual mode, use the widest aperture on your lens (e.g., f/2.8), a shutter speed of around 15-25 seconds, and an ISO of 1600-3200. Manually focus on a bright star using your camera’s live view. Include a bit of the camp or a dune in the foreground to ground the image.
12. What is a polarizing filter and why do I need it for the desert? A circular polarizing filter (CPL) is a piece of glass that screws onto your lens. When you rotate it, it cuts down on polarized light, which manifests as glare and reflections. In the desert, it will dramatically reduce the harsh glare from the sunlit sand, which in turn makes the colors appear deeper and more saturated. It also has the effect of making a blue sky appear a much deeper, richer shade of blue. It’s a game-changer for daytime desert safari photos.
13. How to take a good selfie with a camel? First, be safe and listen to the camel handler. For the photo, use a wide-angle lens or your phone’s wide selfie mode to ensure you can fit both your face and the camel’s in the frame. Try to capture the camel’s personality—they often have amusing expressions. A low angle can be fun and make the camel look even more impressive.
14. What’s the secret to capturing the vibrant colors of a desert sunset? Don’t overexpose the shot. Cameras tend to want to brighten the scene, which will wash out the rich colors. You need to tell your camera to make it darker. On a phone, tap on the brightest part of the sky (the sun itself) and then drag the exposure slider down. On a dedicated camera, use a lower ISO and a faster shutter speed to preserve the deep reds, oranges, and purples.
15. Should I use flash for portraits at sunset? Using a flash can be a great technique for sunset portraits. It’s called “fill flash.” By using a small amount of flash (or a reflector), you can illuminate your subject’s face while still correctly exposing for the colorful sunset behind them. Without it, you would typically have to choose between a well-lit person and a washed-out sky, or a dark silhouette against a perfect sunset. Fill flash gives you the best of both worlds.
16. How can I create a sense of scale in my desert landscape photos? The easiest way is to place a person in your shot. A small human figure standing on a massive sand dune instantly gives the viewer’s brain a reference for how vast the landscape truly is. Without that reference point, it can be hard to judge the size of the dunes. A 4×4 vehicle or a camel can serve the same purpose.
17. What are some creative ways to use shadows in my photos? During the golden hour, your own shadow will become incredibly long. You can use it as a compositional element, making it a subject of the photo. Look for the shadows created by the ripples in the sand—getting low to the ground will accentuate these textures. A silhouette is the ultimate use of shadow, creating a dramatic and emotional image.
18. Best camera settings for golden hour portraits? Use Aperture Priority mode (A or Av) with a wide aperture like f/1.8 to f/4. This will create a soft, blurry background and make your subject stand out. Keep your ISO low (100-400) for the best quality. Use single point autofocus and place it directly on your subject’s eye to ensure the most critical part of the photo is perfectly sharp.
19. How to create a “cinematic” look for my desert photos? The cinematic look often involves a few key elements: a wide aspect ratio (you can crop your photos to a 16:9 ratio), specific color grading (like the popular orange-and-teal look), and a shallow depth of field to draw focus to a subject. Telling a story within the frame, even a simple one, also adds to the cinematic feel.
20. What is the one accessory I should not forget for my desert photoshoot? Besides extra batteries, the one accessory that can make the biggest impact is a circular polarizing filter (CPL). It will improve almost all of your daytime shots by enhancing color and reducing glare. It’s a small, simple tool that provides a professional touch that is very difficult to replicate with editing alone, making it essential for high-quality desert safari photos.
