From Failed Shot to Epic Photo: Conquering Desert Safari Photography Mistakes
A desert safari is a photographer’s dream. It’s a world of dramatic light, sweeping landscapes, and high-speed action. Yet, for every breathtaking photo of a 4×4 cresting a dune, there are a hundred blurry, overexposed, or simply uninspired shots. The desert is a uniquely challenging environment, and common photography habits can quickly lead to disappointing results. Understanding and avoiding the most common desert safari photography mistakes is the single most important step toward capturing the incredible images you envision.
This is not just a list of tips; it is an in-depth guide to transforming your approach. We will dissect the critical errors—from gear preparation and technical settings to composition and mindset—that prevent photographers from realizing the full potential of this amazing landscape. By learning to avoid these pitfalls, you can ensure your photos do justice to the thrilling adventure. A well-organized tour, such as those provided by https://royaldesertadventures.ae/, gives you the perfect opportunity to focus on your craft.
Category 1: The Gear Fails – Mistakes Made Before You Even Leave
Some of the most damaging desert safari photography mistakes happen before you even set foot in the desert. Inadequate preparation of your equipment can lead to missed shots and even damaged gear.
Mistake 1: Underestimating the Sand
- The Disaster: Fine desert sand is the mortal enemy of camera equipment. It’s invasive, abrasive, and can work its way into lens barrels, sensor chambers, and control dials, causing catastrophic and expensive damage.
- The Pro Solution: Treat sand like water. Your camera must be protected at all times. Use a sealed camera bag and only take your camera out when you are ready to shoot. Avoid changing lenses in the open, windy desert at all costs; do it in the shelter of the vehicle. A simple UV filter acts as a sacrificial barrier for your front lens element, and a rocket air blower is essential for safely blowing sand off your gear.
Mistake 2: Forgetting Extra Batteries and Memory Cards
- The Disaster: You’re capturing the most incredible sunset of your life, and your battery dies. Or you’re in the middle of a high-speed dune bashing sequence, and your memory card is full. There are no shops in the middle of the desert.
- The Pro Solution: Pack more than you think you need. The heat can drain batteries faster than usual, and shooting in RAW format and high-speed bursts (which you should be) fills memory cards quickly. A professional would never leave without at least two fully charged spare batteries and a freshly formatted, high-capacity memory card.
Mistake 3: Bringing the Wrong Lens
- The Disaster: You bring only a prime lens and find yourself too close or too far from the action. You bring only a telephoto lens and can’t capture the vastness of the desert landscape. One of the biggest desert safari photography mistakes is a lack of versatility.
- The Pro Solution: A standard zoom lens (like a 24-70mm or 18-135mm) is your most valuable tool. It allows you to capture wide, sweeping vistas one moment and zoom in on a distant camel or 4×4 the next without exposing your sensor to sand by changing lenses.
Mistake 4: Not Using a Lens Hood
- The Disaster: The desert sun is intense and often low in the sky, especially during the golden hour. Without a lens hood, you will suffer from extreme lens flare, which creates hazy, low-contrast images and distracting light artifacts.
- The Pro Solution: Always use the lens hood that came with your lens. It serves two crucial purposes: it blocks stray light from hitting your lens and causing flare, and it provides an extra layer of physical protection against bumps and sand.
Category 2: The Technical Traps – Mistakes in Your Camera Settings
Leaving your camera on “Auto” mode is the fastest way to get average photos. The desert’s unique lighting conditions require you to take manual control.
Mistake 5: Shooting in JPEG Instead of RAW
- The Disaster: The desert light is full of extreme contrasts between blindingly bright sand and deep, dark shadows. A JPEG file compresses and discards a huge amount of data. When you try to edit it later, you’ll find you cannot recover the details in the highlights or shadows.
- The Pro Solution: Always shoot in RAW format. A RAW file is the digital equivalent of a film negative; it captures all the sensor data. This gives you maximum flexibility in post-processing to balance the exposure, adjust colors, and pull detail out of the shadows and highlights, which is a non-negotiable part of overcoming desert safari photography mistakes.
Mistake 6: Using the Wrong Shutter Speed for Action
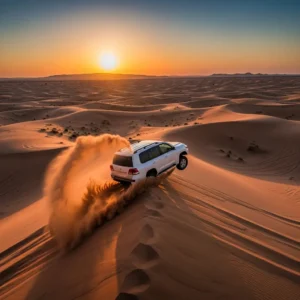
- The Disaster: During the thrilling dune bashing sequence, you use a slow shutter speed (e.g., 1/125s) and end up with a blurry, messy photo where nothing is sharp. The shot completely fails to capture the action.
- The Pro Solution: To freeze the high-speed action of a 4×4 and the sand it kicks up, you need a very fast shutter speed. Set your camera to Shutter Priority (S or Tv) mode and start with 1/1000s. For peak action, push it even higher to 1/2000s or beyond.
Mistake 7: Trusting Auto White Balance
- The Disaster: Your camera’s Auto White Balance gets confused by the overwhelming amount of golden or orange light during sunset, or the blueish light in the shadows. It tries to “correct” it, resulting in photos with unnatural colors that don’t reflect the beauty you saw with your eyes.
- The Pro Solution: Take control of your white balance. Use one of the presets like “Shade” or “Cloudy” during the golden hour to enhance the warm tones. Better yet, learn to set a custom white balance using a grey card for perfectly accurate colors.
Mistake 8: Ignoring Your Histogram
- The Disaster: The bright sun makes your camera’s LCD screen very difficult to see. You think your photo looks perfectly exposed, but when you get home, you find that the bright sand is completely “blown out” (pure white with no detail).
- The Pro Solution: Learn to read your camera’s histogram. This graph shows you the tonal range of your image. If the graph is bunched up and clipped on the far right, it means your highlights are blown out. Adjust your exposure compensation to be slightly darker to preserve those crucial details. This is an advanced but essential skill to avoid critical desert safari photography mistakes.
Category 3: The Compositional Catastrophes – Mistakes in Framing Your Shot
A technically perfect photo can still be boring if the composition is weak. The desert provides a minimalist canvas that makes compositional errors very obvious. For more ideas on framing your desert adventures, you can explore providers like https://dubaidesertsafarie.com/.
Mistake 9: The Centered Subject
- The Disaster: You place the camel, the 4×4, or your friend directly in the middle of every single photo. This creates static, predictable, and often dull images.
- The Pro Solution: Use the Rule of Thirds. Imagine your frame is divided by a tic-tac-toe grid. Place your main subject on one of the lines or, even better, at one of the four intersection points. This simple shift creates a more balanced and dynamic composition.
Mistake 10: Tilted Horizons
- The Disaster: A crooked horizon is one of the most common and jarring desert safari photography mistakes. In the vast, open desert, a tilted horizon line instantly makes a photo look unprofessional and unbalanced.
- The Pro Solution: Use your camera’s built-in electronic level or turn on the grid display in your viewfinder or on your LCD screen. Align the horizon with one of the horizontal grid lines to ensure it is perfectly straight.
Mistake 11: Forgetting a Sense of Scale
- The Disaster: You take a photo of a massive sand dune, but it just looks like a small hill because there’s nothing in the frame to give it context. The epic scale of the landscape is lost.
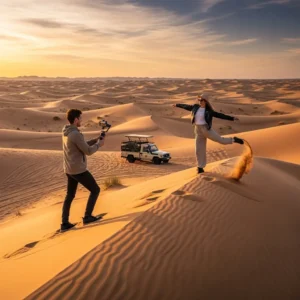
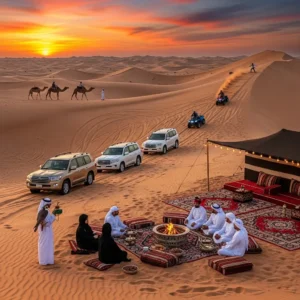
- The Pro Solution: Intentionally include an element that provides a sense of scale. A person standing on the dune, a distant 4×4, or even a line of camels can instantly communicate the vastness of the environment to the viewer.
Mistake 12: Never Changing Your Perspective
- The Disaster: You spend the entire safari taking photos from a standing, eye-level position. All your photos end up having the same predictable perspective.
- The Pro Solution: Move your body! Get down low to the ground to make the dunes look like towering mountains. Find a high vantage point to capture a top-down view of the convoy. Shoot through the car window to use it as a frame. A change in perspective can transform a simple shot into a creative masterpiece.
Category 4: The Planning & Mindset Missteps
Your approach and planning play a huge role in the success of your photography.
Mistake 13: Missing the Golden Hour
- The Disaster: You book a safari that takes place in the middle of the day. You are left to shoot in the harshest, most unflattering light, which creates deep, dark shadows and washed-out colors.
- The Pro Solution: The golden hour (the hour after sunrise and before sunset) is non-negotiable for stunning desert photography. The light is soft, warm, and directional, creating beautiful long shadows that define the shape of the dunes. Always book an evening safari to ensure you are in the desert during this magical time. You can find safari timings at https://hafiztourism.com/.
Mistake 14: Not Communicating with Your Driver
- The Disaster: Your safari driver is an expert at navigating the dunes but has no idea that you are trying to capture specific photos. You miss incredible shots because you weren’t ready or in the right position.
- The Pro Solution: Have a friendly chat with your driver before the dune bashing begins. Let them know you are a photographer. Ask if they can give you a heads-up before a big maneuver or if they can position the vehicle for a good sunset shot. They are often your best ally in getting amazing photos.
Mistake 15: Forgetting to Enjoy the Experience
- The Disaster: You spend the entire safari with your eye glued to the viewfinder, so obsessed with getting the perfect shot that you forget to actually experience the thrill and beauty of the desert.
- The Pro Solution: Remember to put the camera down. Take a moment to feel the wind, watch the sunset with your own eyes, and listen to the silence of the desert. The best photos often come when you are connected to the experience. A great safari, like one from https://royaldesertadventures.ae/, is an adventure first and a photo shoot second.
Frequently Asked Questions (FAQs)
- My biggest problem is blurry photos during dune bashing. What’s the main fix? The number one cause of blurry action shots is a shutter speed that is too slow. To fix this, you must take your camera out of Auto mode and set it to Shutter Priority (S or Tv). Dial in a fast shutter speed—start at 1/1000 of a second. This will force the camera to freeze the motion of both the 4×4 and the flying sand, resulting in crisp, sharp images.
- Why do my sunset photos look washed out and not as golden as I see them? This is a classic white balance issue and one of the most common desert safari photography mistakes. In Auto mode, your camera sees the intense golden light and tries to “correct” it back to neutral, stripping away the magic. The solution is to manually set your white balance to a warmer preset, like “Cloudy” or “Shade,” which will tell your camera to preserve and even enhance those beautiful golden and orange tones.
- Is a polarizing filter (CPL) really necessary for the desert? Yes, it is one of the most impactful accessories you can use. The desert sky is vast, and the sun reflects off the sand, creating a lot of haze and glare. A CPL filter cuts through this glare, dramatically deepening the blue of the sky and increasing the color saturation of the dunes. It will make your photos look significantly more vibrant and professional straight out of the camera.
- I only have a smartphone. Can I still avoid these mistakes? Absolutely. Most modern smartphones have a “Pro” or “Manual” mode that allows you to control key settings. You can manually increase the shutter speed for action shots, adjust the white balance for sunsets, and choose to shoot in RAW format. You can also apply compositional rules like the Rule of Thirds and focus on finding unique perspectives, regardless of the gear you use.
- How do I stop my photos from being too bright (overexposed)? The bright sand can easily fool your camera’s light meter into overexposing the shot. The best tool to combat this is the Exposure Compensation dial (usually marked with +/-). If your photos are consistently too bright, dial the exposure compensation down by -0.7 or -1.0. This tells your camera to intentionally make the image darker, which will preserve the details in the bright sand.
- What’s the best way to clean sand off my lens without scratching it? Never, ever wipe a sandy lens with a cloth. This will drag the abrasive sand particles across the glass and create permanent scratches. The correct method is to first use a rocket air blower to blast off all the loose particles. Only after you have blown the sand away is it safe to gently wipe the lens with a clean microfiber cloth.
- Is it better to underexpose or overexpose a desert photo? It is always better to slightly underexpose your photo. In digital photography, it is much easier to recover details from the dark shadow areas of an underexposed image than it is to recover details from the “blown out” highlights of an overexposed image. Once a highlight is pure white, that data is lost forever.
- I feel awkward telling my safari driver what to do. Any advice? Think of it as a collaboration, not giving orders. Be polite and enthusiastic. Before you start, you can say something like, “I’m really excited about taking some photos today! If you see a great spot for a picture, please let me know!” Most drivers take great pride in their desert and are happy to help you capture its beauty.
- What is the “histogram” and why does it matter so much? The histogram is a graph on your camera’s screen that shows the distribution of tones in your photo, from pure black on the left to pure white on the right. It matters because your LCD screen can be misleading in the bright sun. The histogram gives you a 100% accurate reading of the exposure. If the graph is pushed up against the right wall, it’s a warning that your highlights are overexposed, even if the picture looks okay on the screen.
- Should I use my camera’s built-in flash during the day? Yes, using your flash during the day (a technique called “fill flash”) can be very useful. If you are taking a portrait of a person with the bright sun behind them, their face will likely be in shadow. A little bit of fill flash can brighten up their face and add a “catchlight” to their eyes, creating a much more balanced and professional-looking portrait.
- My landscape shots of the dunes look flat. How do I add depth? To add depth, you need to think in layers: foreground, middle ground, and background. One of the biggest desert safari photography mistakes is ignoring the foreground. Instead of just shooting the distant dunes, find something interesting in the foreground—like ripple patterns in the sand, a desert plant, or interesting tracks—to include in the bottom part of your frame. This will draw the viewer into the image.
- Is it a bad idea to change lenses during the safari? It is generally a risky idea. Every time you remove your lens, you expose your camera’s sensitive sensor to the open air. In the desert, this means fine sand particles can get inside and stick to the sensor, resulting in black spots on all your future photos. If you absolutely must change lenses, do it inside the vehicle with the windows closed and the A/C off.
- What is “back button focus” and can it help? Back button focus is an advanced technique where you decouple the autofocus from the shutter button and assign it to a button on the back of the camera. This can be extremely helpful for action photography. It allows you to maintain continuous focus on a moving vehicle with your thumb while choosing the exact moment to take the picture with your index finger, giving you more control.
- How do I capture the motion of the Tanoura dancer at the camp? This requires a slow shutter speed. Set your camera on a stable surface or tripod, switch to Shutter Priority (S or Tv), and choose a slow speed like 1/8s or 1/4s. When the dancer spins, the lights on their costume will create beautiful, smooth light trails, capturing the essence of the motion in a single, artistic frame.
- My camera has different autofocus area modes. Which one should I use? For tracking a single moving 4×4, a “Dynamic Area AF” or “Zone AF” mode is often best. This allows you to keep a cluster of focus points on the vehicle. For a wider landscape shot, a single focus point is better, as it gives you precise control over exactly what part of the scene you want to be the sharpest. Avoid the “Auto Area AF” which lets the camera guess what to focus on.
- Why do professional desert photos have such deep blue skies? This is almost always the result of using a Circular Polarizing (CPL) filter. A polarizer works by cutting out polarized light, which is reflected as glare. By reducing the glare from the atmosphere and the sand, it allows the natural, deep blue color of the sky to be captured by the camera. It’s the single most impactful filter for desert landscapes.
- I struggle with finding good compositions. What’s a simple tip? Look for “S-curves.” The ridges of sand dunes often form beautiful, flowing S-curves. Frame your shot so that one of these curves leads from the bottom corner of your photo into the frame. This is a classic compositional tool that creates a sense of flow and guides the viewer’s eye through your image.
- Is it better to shoot from inside or outside the vehicle during dune bashing? Both offer different perspectives. Shooting from inside gives you a sense of immersion and allows you to capture passenger reactions. Shooting from outside (during a designated photo stop) allows you to capture the vehicle interacting with the epic landscape. A complete story of the event includes shots from both inside and out.
- How do I avoid getting my own shadow in the photo during sunset? This is a common problem during the golden hour when shadows are very long. The key is to be aware of the sun’s direction. Try to position yourself so the sun is to your side rather than directly behind you. If your shadow is still in the frame, change your composition or move to a different spot.
- What is the biggest mindset mistake photographers make in the desert? The biggest mindset mistake is having a rigid plan and not adapting to the conditions. The desert is a dynamic environment. The light changes constantly, and the action during dune bashing is unpredictable. The best photographers are those who can react to the moment, see unexpected opportunities, and embrace the beautiful chaos of the experience rather than getting frustrated that it’s not matching their preconceived shot list.
