Beyond the Blur: A Masterclass in Dune Bashing Photography
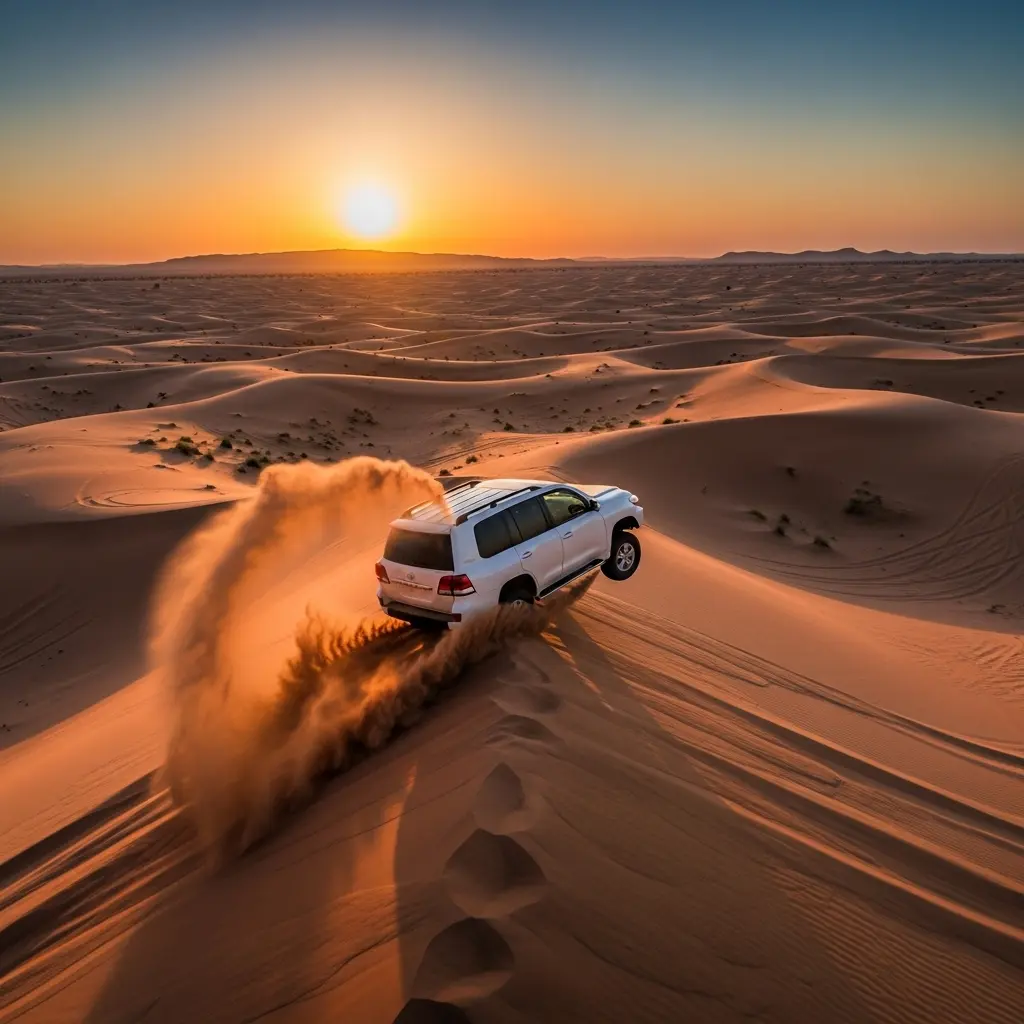
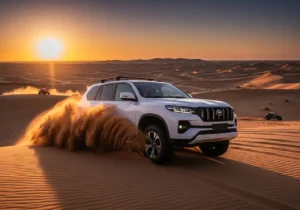
Dune bashing is a symphony of controlled chaos. It’s the roar of a powerful 4×4 engine, the thrilling slide down a sheer wall of sand, and the spectacular explosion of golden particles against a brilliant blue sky. Capturing this exhilarating experience in a photograph is a unique challenge. Standard point-and-shoot methods often result in blurry messes or static images that fail to convey the incredible sense of speed and motion. This is where the art of dune bashing photography comes in.
This in-depth guide is designed to be your masterclass. We will move beyond the basics and delve into the specific techniques, camera settings, and creative approaches required to freeze a moment of airborne sand or beautifully blur the background to emphasize speed. Mastering dune bashing photography transforms your desert safari from a simple tourist activity into a creative expedition. An incredible desert safari experience, like those offered by https://royaldesertadventures.ae/, provides the perfect canvas for these photographic techniques.
The Foundation: Understanding the Exposure Triangle for the Desert
Before diving into specific techniques, it’s crucial to understand the three core elements of photography and how they behave in the unique environment of a desert. The exposure triangle—aperture, shutter speed, and ISO—work together to control the brightness of your image.
Shutter Speed: The Key to Capturing Motion
Shutter speed is the most critical setting for dune bashing photography. It refers to the length of time your camera’s sensor is exposed to light.
- Fast Shutter Speed (e.g., 1/1000s and above): This freezes motion. It’s perfect for capturing the 4×4 in sharp detail as it kicks up sand, freezing every single grain in mid-air.
- Slow Shutter Speed (e.g., 1/30s to 1/125s): This creates motion blur. It’s the secret to techniques like panning, where the background blurs beautifully while the vehicle remains relatively sharp.
Aperture: Controlling Light and Depth
Aperture refers to the opening in your lens that lets light in. It’s measured in f-stops (e.g., f/2.8, f/8, f/16).
- Wide Aperture (e.g., f/2.8): Lets in a lot of light and creates a shallow depth of field, blurring the background. This can help your subject vehicle “pop.”
- Narrow Aperture (e.g., f/11): Lets in less light and creates a deep depth of field, keeping both the vehicle and the vast desert landscape in sharp focus.
ISO: Your Camera’s Sensitivity to Light
ISO measures your camera sensor’s sensitivity. In the bright desert sun, you should keep your ISO as low as possible (e.g., 100 or 200) to get the cleanest, highest-quality image with no grain. You’ll only need to increase it during the golden hour or after sunset.
The Essential Gear: Your Dune Bashing Photography Toolkit
While any camera can take a picture, the right gear can dramatically increase your chances of capturing incredible motion shots.
Choosing Your Camera
- DSLR or Mirrorless Camera: These are the best options as they offer full manual control over settings, interchangeable lenses, and superior image quality.
- Action Camera (e.g., GoPro): Perfect for mounting inside or outside the 4×4 to capture immersive, wide-angle video and photos. Their durability is a huge plus in the sandy environment.
- Smartphone: Modern smartphones have impressive cameras with “Pro” modes that allow some manual control. They are great for quick shots and practicing composition.
The Right Lenses
- Standard Zoom Lens (e.g., 24-70mm): This is the most versatile lens for dune bashing photography, allowing you to go from wide landscape shots to tighter shots of the vehicles without changing lenses.
- Telephoto Lens (e.g., 70-200mm): Excellent for compressing the perspective and making distant dunes look closer. It’s perfect for capturing shots of other vehicles in your convoy from a distance.
Must-Have Accessories
- Circular Polarizing (CPL) Filter: This is a game-changer in the desert. It reduces glare from the sand and deepens the blue of the sky, making your photos look more vibrant straight out of the camera.
- Neutral Density (ND) Filter: This acts like sunglasses for your lens, reducing the amount of light that enters. This is essential if you want to use slow shutter speeds for motion blur in the bright midday sun.
- Extra Batteries: The heat can drain batteries quickly, and there’s nowhere to charge in the middle of the desert. Always bring at least one spare.
- Camera Cleaning Kit: Sand is the enemy. A rocket blower and a soft lens brush are non-negotiable for keeping your gear clean and functional.
The Master Technique: Freezing Motion with a Fast Shutter Speed
One of the most dramatic shots in dune bashing photography is freezing the action at its peak. Imagine a 4×4 cresting a dune, kicking up a massive cloud of sand, with every particle frozen in time against the sky.
The Goal: Absolute Sharpness
The objective here is to eliminate all motion blur. You want the vehicle, the sand, and the background to be tack-sharp. This technique is all about capturing the raw power and drama of a single moment.
The Camera Settings
- Mode: Shutter Priority (Tv or S) or Manual (M).
- Shutter Speed: This is your hero setting. Start at 1/1000s. For really fast action, push it to 1/2000s or even 1/4000s.
- Aperture: If in Shutter Priority, the camera will choose this for you. In Manual, start around f/8 to keep the vehicle and its immediate surroundings sharp.
- ISO: Keep it at its base level, typically ISO 100.
- Focus Mode: Set your camera to Continuous Autofocus (AF-C or AI Servo). This tells the camera to constantly track the moving vehicle.
- Drive Mode: Use the fastest burst or continuous high-speed shooting mode. This allows you to take a rapid sequence of photos, increasing your chances of capturing the perfect millisecond of action.
The Artistic Technique: Panning for a Sense of Speed
Panning is the quintessential technique for conveying motion in still photography. The goal is to keep the moving subject (the 4×4) relatively sharp while the background streaks into a beautiful blur. This visually communicates speed and dynamism.
The Goal: A Sharp Subject, A Blurry World
Mastering the pan is a core skill in dune bashing photography. It requires smooth movement and the right camera settings.
The Step-by-Step Panning Guide
- Find Your Stance: Stand with your feet shoulder-width apart, facing the path the vehicle will take. You will twist at your waist, not move your feet.
- Set Your Camera: Switch to Shutter Priority (Tv or S) mode.
- Choose a Slow Shutter Speed: This is the creative part. Start with a shutter speed between 1/60s and 1/125s. If you go too slow, the vehicle will also be blurry. If you go too fast, the background won’t blur enough.
- Track Your Subject: As the 4×4 approaches, lock your focus on it and begin smoothly tracking its movement by twisting your upper body. Your camera should move at the same speed as the vehicle.
- Press the Shutter (and Follow Through!): Gently press the shutter button to take the shot, but do not stop moving the camera. You must continue the smooth panning motion even after the photo is taken. This “follow-through” is the secret to a clean pan.
Composition: Arranging the Elements of Your Desert Shot
Great technical settings are only half the battle. Strong composition is what turns a snapshot into a compelling photograph. The desert offers a beautiful, minimalist canvas for practicing these rules. For more travel inspiration in the region, you can explore offerings from providers like https://dubaidesertsafarie.com/.
The Rule of Thirds
Imagine your frame is divided into a 3×3 grid. Instead of placing the 4×4 right in the center, position it along one of the grid lines or at an intersection point. This creates a more balanced and visually interesting image.
Leading Lines
The desert is full of natural lines. Use the sweeping, curved ridges of the sand dunes as leading lines to draw the viewer’s eye through the image and towards the subject vehicle.
A Sense of Scale
The sand dunes can be massive, but it’s hard to show that in a photo without a reference point. Including another vehicle, a person, or even the tracks in the sand can provide a crucial sense of scale, emphasizing the vastness of the landscape. This is a key part of effective dune bashing photography.
Harnessing the Desert Light
Light is the most important ingredient in any photograph. The light in the desert is intense and changes dramatically throughout the day.
The Magic of the Golden Hour
The best time for any desert photography is the “golden hour”—the first hour after sunrise and the last hour before sunset. During this time, the sun is low in the sky, creating soft, warm, golden light. The long shadows cast by the dunes add depth, texture, and drama to your images, making your dune bashing photography truly spectacular.
Shooting in Harsh Midday Sun
If you are shooting in the middle of the day, the sun will be directly overhead, creating harsh shadows and bright, washed-out highlights. Use a Circular Polarizing (CPL) filter to cut through the glare and deepen the sky. Look for dramatic, high-contrast scenes or try creating silhouettes of the vehicles against the bright sky.
For more general travel planning to make the most of the desert light, resources like https://hafiztourism.com/ can be invaluable.
A day of dune bashing photography is a thrilling challenge that combines technical skill, artistic vision, and a spirit of adventure. It’s about more than just taking pictures; it’s about learning to see and capture the dynamic energy of one of the UAE’s most exciting experiences. A trip booked through https://royaldesertadventures.ae/ will give you the perfect opportunity to put all these skills to the test.
Frequently Asked Questions (FAQs)
- What are the most important camera settings for dune bashing photography? The single most important setting is your shutter speed. A fast shutter speed (1/1000s or faster) will freeze the action, capturing sharp images of the 4×4 and the flying sand. A slow shutter speed (between 1/30s and 1/125s) is essential for creating motion blur and for the technique of panning, which makes the background streak while the vehicle stays sharp.
- Can I take good motion shots with my smartphone? Yes, you can. While a DSLR or mirrorless camera offers more control, modern smartphones are incredibly capable. Use your phone’s “Pro” or “Manual” mode to adjust the shutter speed. For freezing motion, make sure you are shooting in bright daylight. For panning, select a slower shutter speed and practice the smooth follow-through motion. Using the burst mode feature is also highly recommended.
- How do I protect my camera gear from the fine desert sand? Protecting your gear is crucial. Keep your camera in a sealed bag when not in use. Avoid changing lenses in the open desert if possible; do it inside the vehicle. A UV filter on your lens acts as a physical barrier. A rocket air blower is the most important tool for safely blowing sand off your camera and lens without scratching them. Never use your breath, as it contains moisture.
- What is the “best” lens for dune bashing photography? The most versatile and recommended lens is a standard zoom, such as a 24-70mm or an 18-135mm. This allows you to capture wide, sweeping landscape shots of the dunes and also zoom in to get tighter action shots of the vehicles without needing to change lenses and risk exposing your camera’s sensor to sand.
- What is panning, and why is it so difficult? Panning is the technique of moving your camera along with a moving subject to keep it sharp while blurring the background. It’s difficult because it requires you to match the speed of your camera’s movement precisely with the speed of the subject. The key is a smooth, consistent motion from your hips and a steady follow-through even after you’ve taken the picture. It takes a lot of practice to master.
- Should I shoot in RAW or JPEG? For dune bashing photography, it is highly recommended to shoot in RAW format. A RAW file captures all the data from the camera’s sensor, giving you much more flexibility in post-processing. This allows you to recover details in the bright highlights of the sunlit sand and the deep shadows, which is much harder to do with a compressed JPEG file.
- What is the best time of day for a desert safari photo shoot? The golden hour is the absolute best time. This is the hour just after sunrise and the hour just before sunset. During this time, the desert light is soft, warm, and golden, and the low angle of the sun creates long, dramatic shadows that define the shape and texture of the dunes. Midday should be avoided if possible due to the harsh, unflattering overhead light.
- How do I get that shot with the sand “frozen” in the air? That shot requires a very fast shutter speed. Set your camera to Shutter Priority mode (S or Tv) and dial in a speed of at least 1/1000s, though 1/2000s is even better. Use continuous autofocus to track the vehicle and then shoot in high-speed burst mode as the vehicle hits the top of a dune to capture the peak sand spray.
- Should I use a tripod? For most action shots during dune bashing photography, a tripod is too slow and cumbersome. You need to be able to move and react quickly. However, a tripod is essential if you plan to stay after sunset to take photos of the stars or to capture long-exposure light trails of the vehicles in the dark. A monopod can be a good compromise, offering stability for panning without the bulk of a tripod.
- How important is a lens filter in the desert? It is extremely important. A Circular Polarizing (CPL) filter is a must-have. It works by cutting down on the reflective glare from the sand, which makes the colors in your photo, especially the blue of the sky, appear much deeper and more saturated. A UV filter is also highly recommended, not for its optical qualities, but as a cheap, replaceable layer of protection for your expensive lens glass against sand and scratches.
- What focus mode is best for tracking fast-moving 4x4s? You must use a continuous autofocus mode, which is called AF-C on Nikon and Sony cameras, and AI Servo on Canon cameras. This mode tells the camera’s autofocus system to constantly track a moving subject as long as you have the shutter button half-pressed, which is essential for keeping the fast-moving vehicles sharp.
- How can I make the dunes look bigger and more dramatic? To emphasize the scale of the dunes, try shooting from a very low angle. This makes the dunes tower over the viewer. Another powerful technique is to use a telephoto lens, which has the effect of compressing the perspective and making the background dunes appear larger and closer than they really are.
- Is it better to be a passenger or the driver for photography? You should absolutely be a passenger. Driving during dune bashing requires 100% of the driver’s attention and skill. As a passenger, you are free to look around, anticipate the action, and operate your camera safely. The front passenger seat often offers the best forward-facing views.
- How do I communicate with my safari driver to get the best shots? Communication is key. Before the ride starts, have a friendly chat with your driver. Let them know you are a keen photographer and ask if they can help position the vehicle for good shots or let you know when a particularly exciting maneuver is coming up. Most safari drivers are very experienced and happy to help you get great photos.
- What is “motion blur” and how do I create it intentionally? Motion blur is the streaking effect that appears in photos when a subject or the camera moves during a long exposure (slow shutter speed). To create it intentionally for an artistic effect in dune bashing photography, use a slow shutter speed (like 1/30s) and keep your camera very still as the 4×4 drives past. The vehicle will appear as a blur of motion, conveying a powerful sense of speed.
- Is it safe to use a drone during a desert safari? You must check the latest local regulations regarding drone use, as they are very strict in the UAE. Often, flying is restricted in desert conservation areas or near airports. If you are permitted to fly, a drone can capture absolutely breathtaking aerial shots of the 4×4 convoy navigating the vast sea of dunes. Always fly responsibly and maintain a line of sight.
- How do I deal with the extreme contrast between bright sand and dark shadows? This is a major challenge. Shooting in RAW format is the best solution, as it gives you the most data to work with in post-processing to balance the light. You can also use your camera’s HDR (High Dynamic Range) mode, which takes multiple pictures at different exposures and blends them together to create a more evenly lit image.
- What’s the one accessory I should not forget? Extra batteries. The heat of the desert and the constant use of your camera’s screen and autofocus will drain your batteries much faster than usual. Having at least one or two fully charged spare batteries is non-negotiable to avoid your camera dying in the middle of the best action.
- How can I practice panning before I go on the safari? Panning is a skill that requires practice. You can practice in your own neighborhood by standing on the side of a road and tracking passing cars, cyclists, or runners. Experiment with different shutter speeds to see how they affect the background blur. This practice will make a huge difference when you are in the desert.
- My motion shots are always blurry. What is the most common mistake? The most common mistake, especially with panning, is stopping the camera’s movement the moment you press the shutter button. You must follow through with the smooth motion, continuing to track the subject even after you hear the camera’s click. This smooth follow-through is the secret to getting a sharp subject against a blurred background.

